Hydro Single19

1kW of quiet, portable water or air heating from 120v. APW12 enables under/overclocking.
Use for:
- RV water heater. Power with alternator via inverter or power station. Use existing RV plumbing/pump (hot hose on low → heat exchanger → fill port)
- Heat water at a job or camp site
- Add to a sidearm loop on an existing water heater
- Attach via a circulation pump to a kids pool (use a different heat exchanger if its chlorinated…)
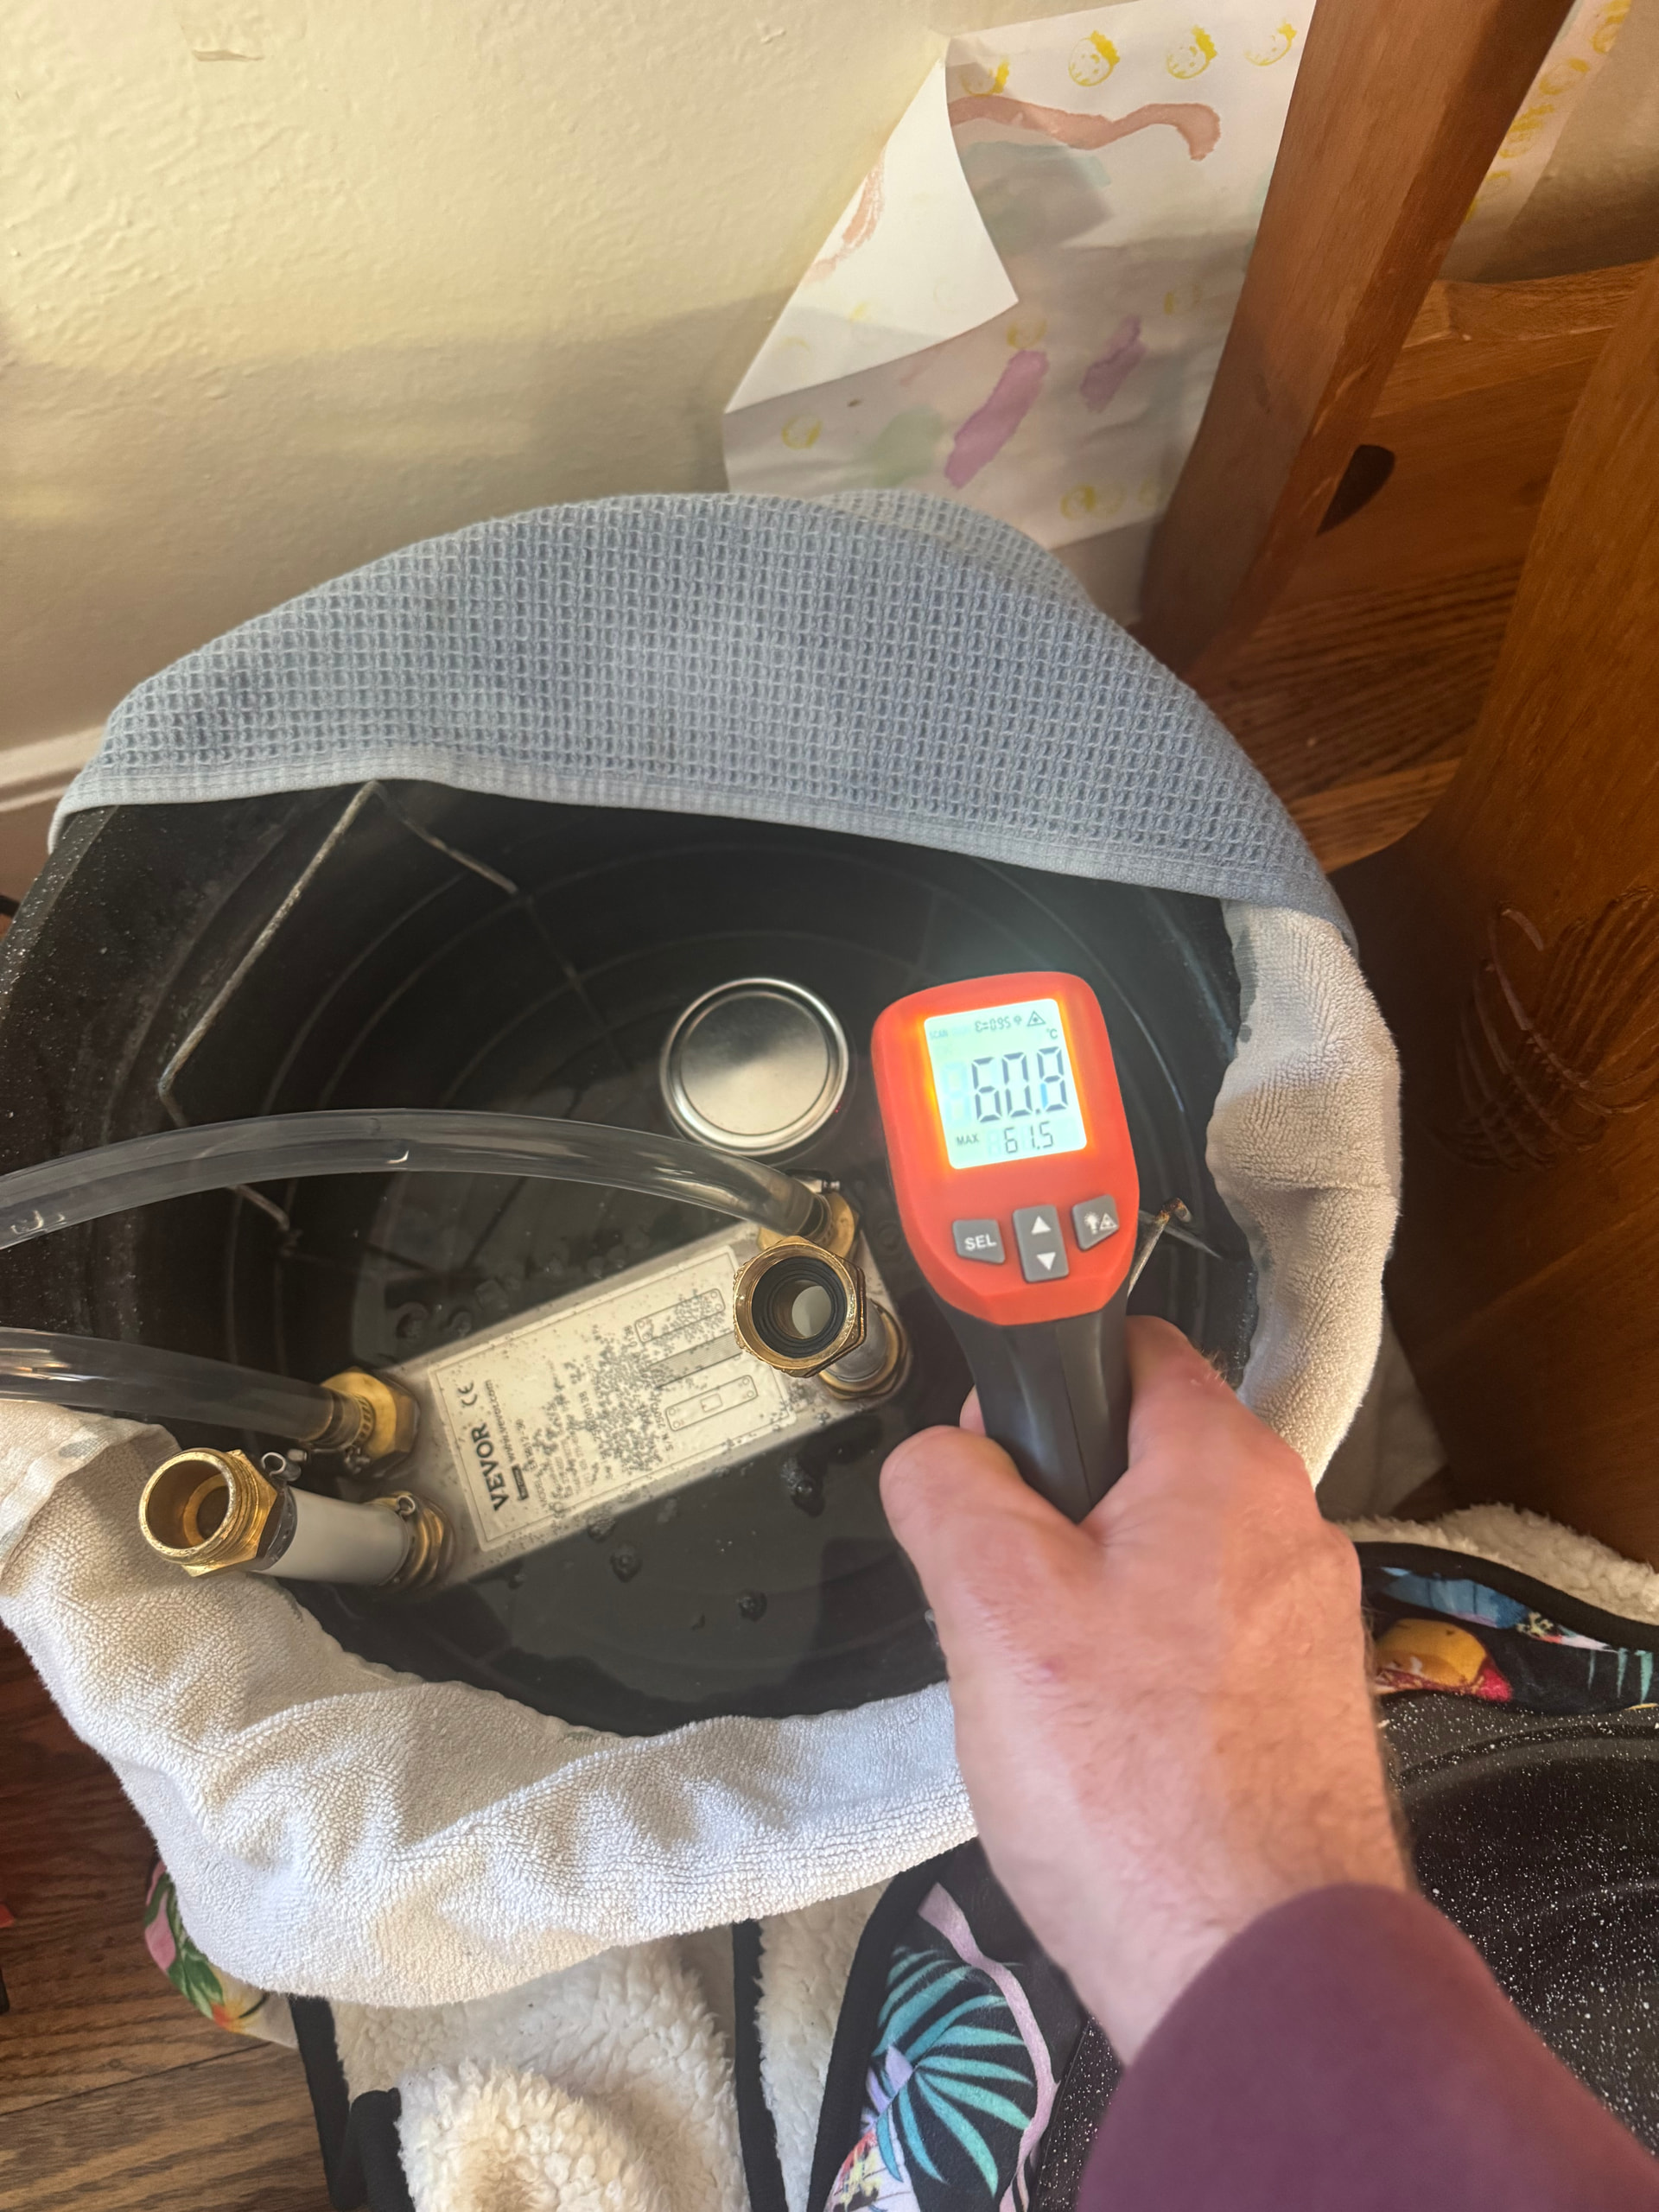
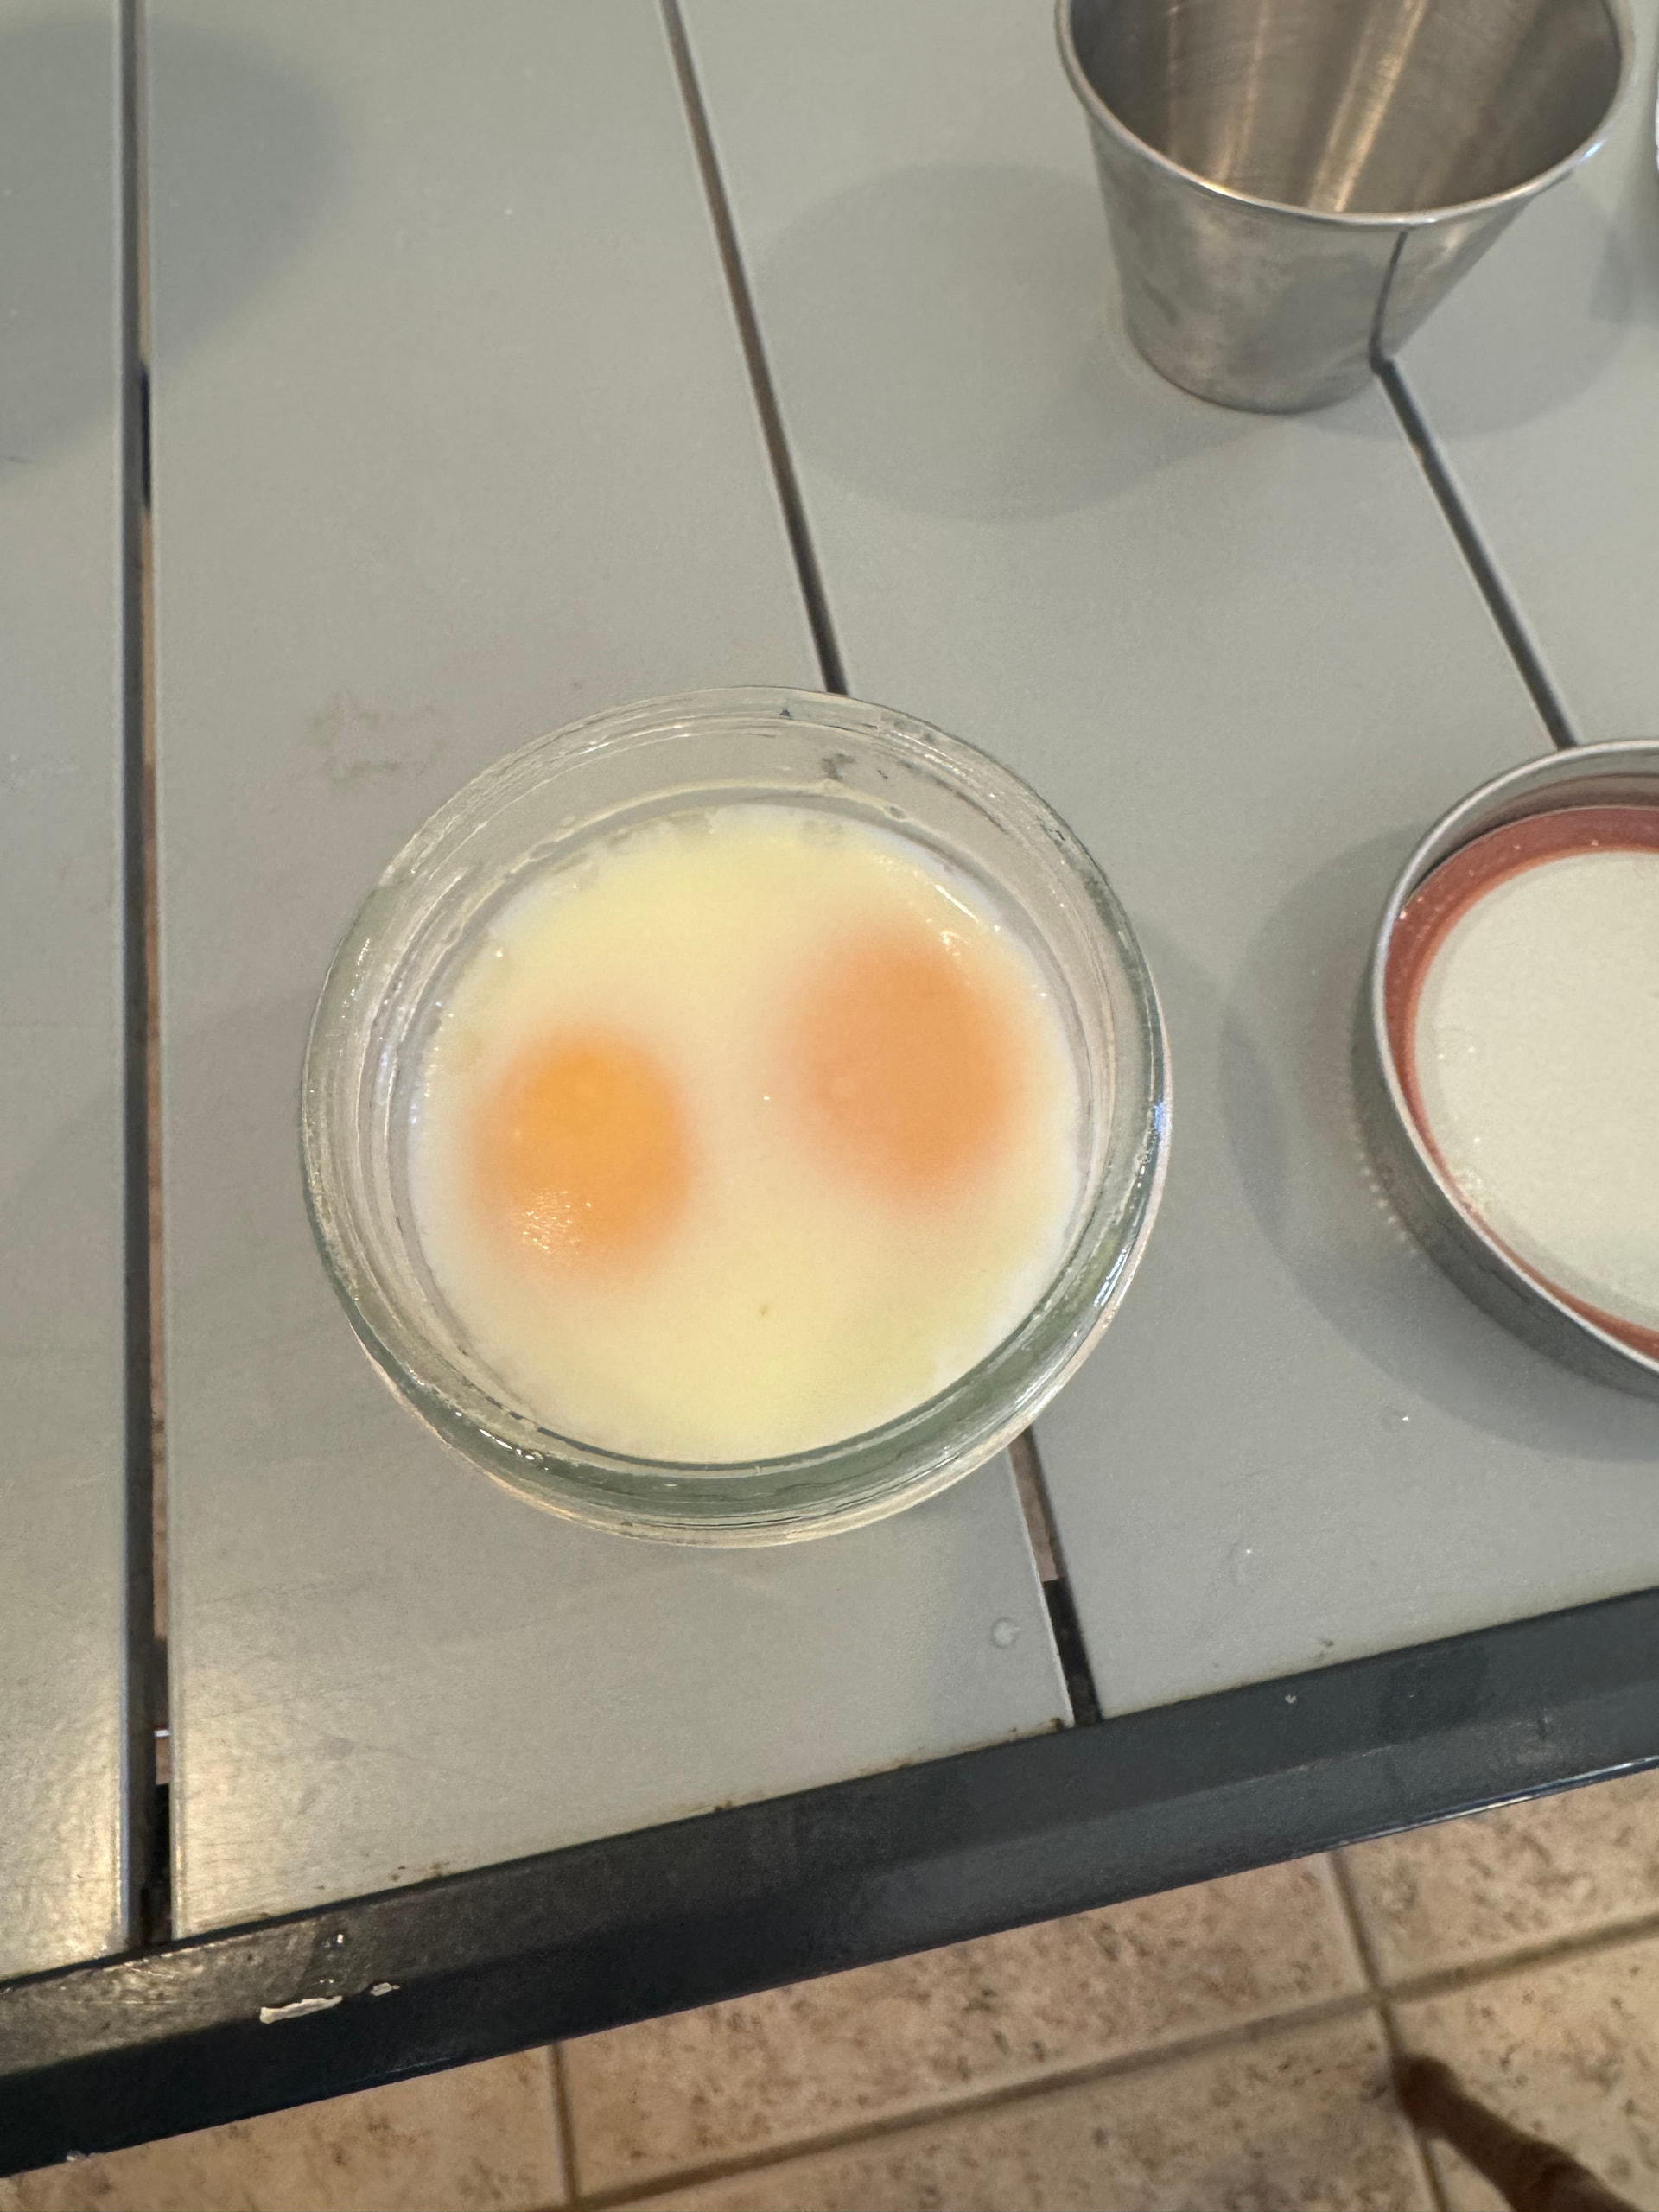
- Dunk the heat exchanger in a bucket of water for sous vide
- Stock tank ice melter
- Etc.
Parts:
| Part | Supplier |
|---|---|
| S19J Pro board | Upcycled e-waste |
| APW12 (with 120v mod) | Upcycled e-waste + resistors |
| Bitmain control board | Upcycled e-waste |
| Zeus water block | zeusbtc.com |
| Heat exchanger 3" x 7.5" x 30 plate | vevor.com |
| Hydro pump/reservoir | Amazon |
| 240mm PC radiator | Amazon |
| Arctic P12 Max fans x2 (Radiator) | Amazon |
| Noctua 60mm fans x3 (PSU) | Amazon |
| Hydro tubing | Amazon |
| Hydro fittings | Amazon |
| Misc wiring components | Amazon |
| Mine4heat enclosure + furniture | 3DFuel Pro-PCTG filament |
| Sentinel X100 corrosion inhibitor | supplyhouse.com |
Build
I used an APW12 with the 120v mod completed. APW3 would be fine but I figured since i could cool it well I should leave the potential for overclocking (provided I have sufficient power). To power the pump, I spliced in to the 6-pin wires from the PSU to the control board. So one end has the 6-pin connector and the other end has a 6-pin connector, barrel jack for Vonets, and Molex connector for the hydro pump. For the Hashboard I cut the stock bus bars down to size.
I started with the mine4heat enclosure but realized I didn’t need the “flared” fan mounts but did need a place to attach the radiator, so I designed (hacked together) some custom parts:
- Fanless grille for the back
- Fanless grille for the front
- Control board cover with radiator mount
- Shorter carry handle
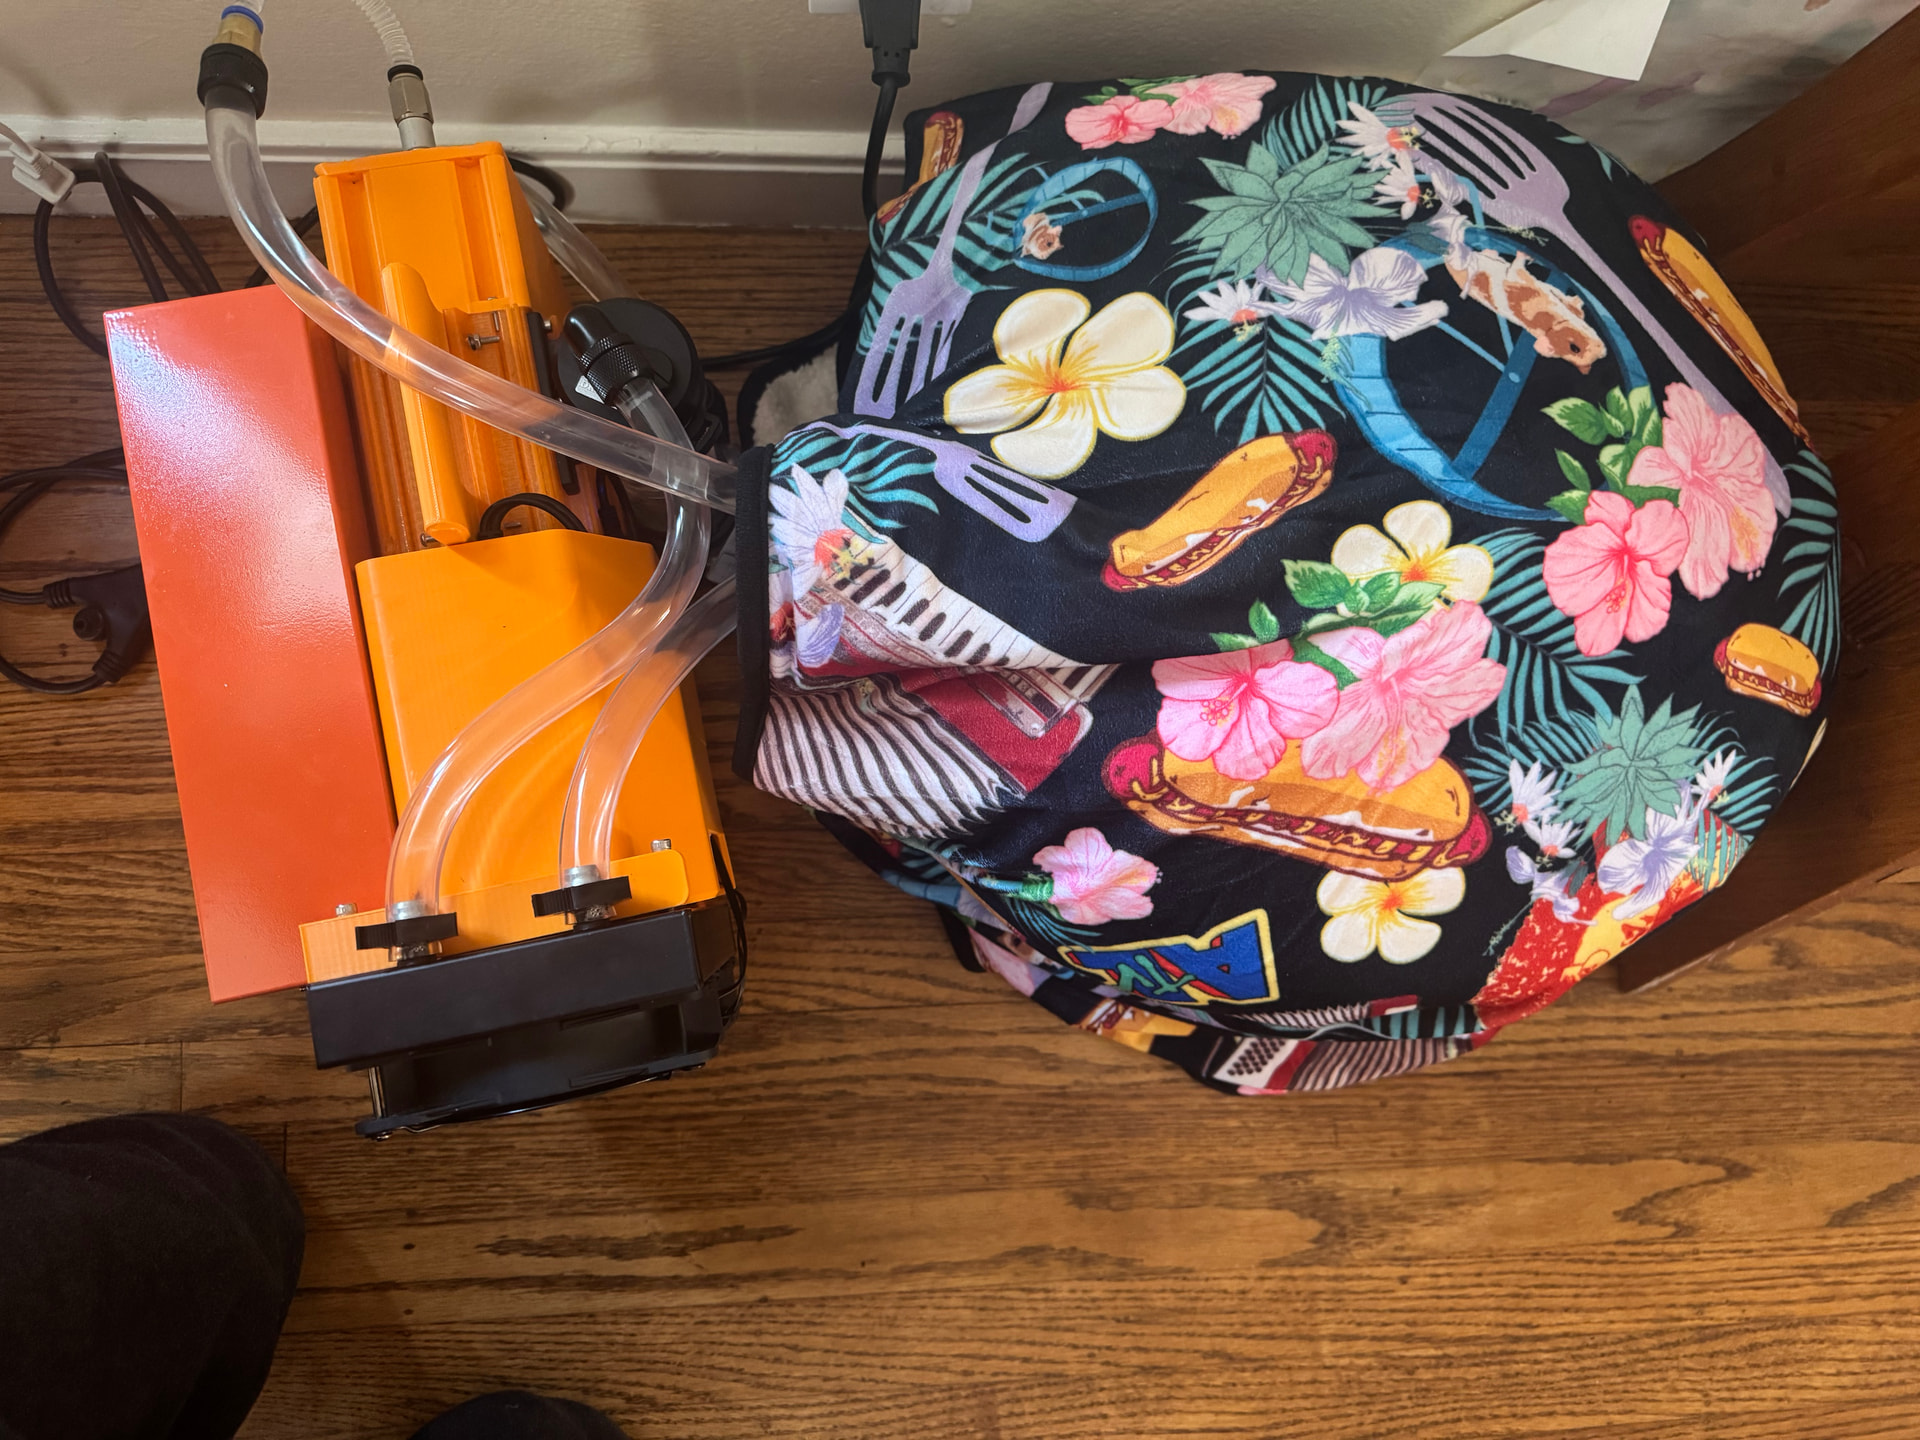
I replaced the heat sink on the hashboard with a Zeus Mining water block and used the Zeus mining push to fit adapters and 8mm OD corrugated tubing they included. I did need to find these fittings to go from the Zeus tubing to the standard g1/4 fittings that the PC hydro stuff uses.
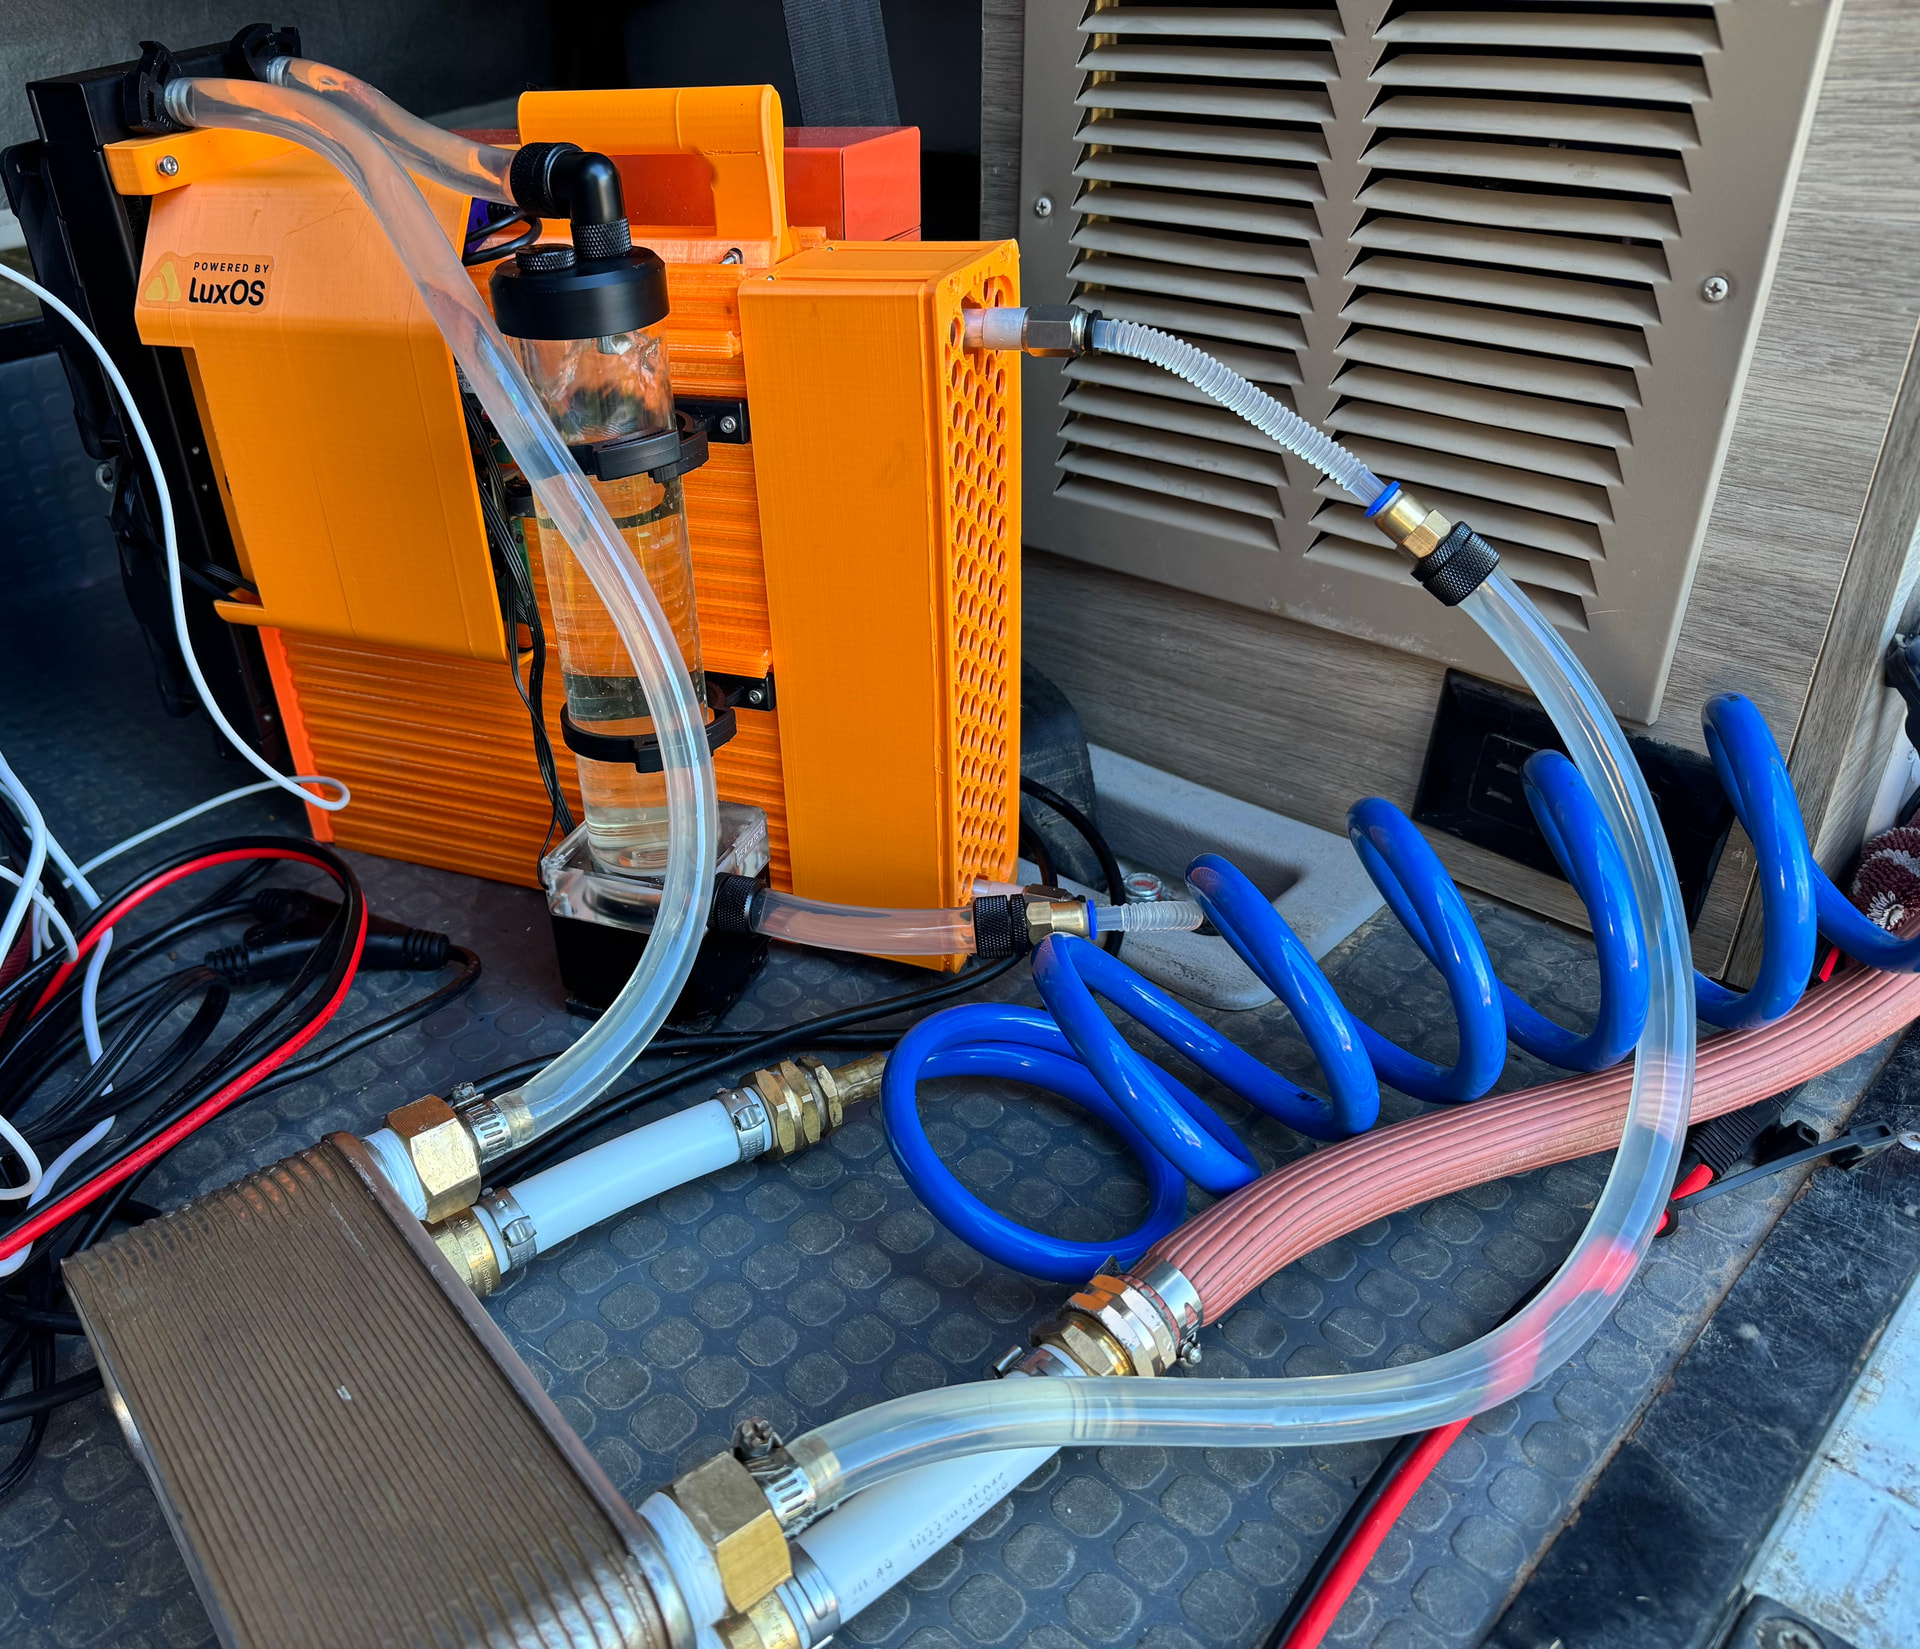
The hydro loop is:
Pump/reservoir → Hashboard (in lower port, out top port) → Plate heat exchanger → radiator → back to Pump
I put the heat exchanger closest to the hashboard outlet so it gets the most heat. Then if our exchanger isn’t pulling enough heat out, the radiator takes care of the rest. This also lets you use this as a basic space heater without having to change anything. Using LuxOS to manage the fans, they will only turn on once the board temp is high enough (I set target temp to 60c).
Operation
The main use case is in my camper van. I power the miner from a portable power station that is being charged by the alternator/solar when we’re driving or shore power if we’re plugged in. Starlink or mobile hotspot for data. I set the target temp in LuxOS to 60 and adjust power draw to about 450-500w. Could go much higher depending on your power source.
On the van side, I hook our sprayer hose (blue) up to the heat exchanger inlet and connect the outlet to the water fill port on the van. Then I crack the hot faucet on very low. I also had to figure out the non-standard configuration of the van water panel that let me pump water back in the fill port while in “dry camping” mode.
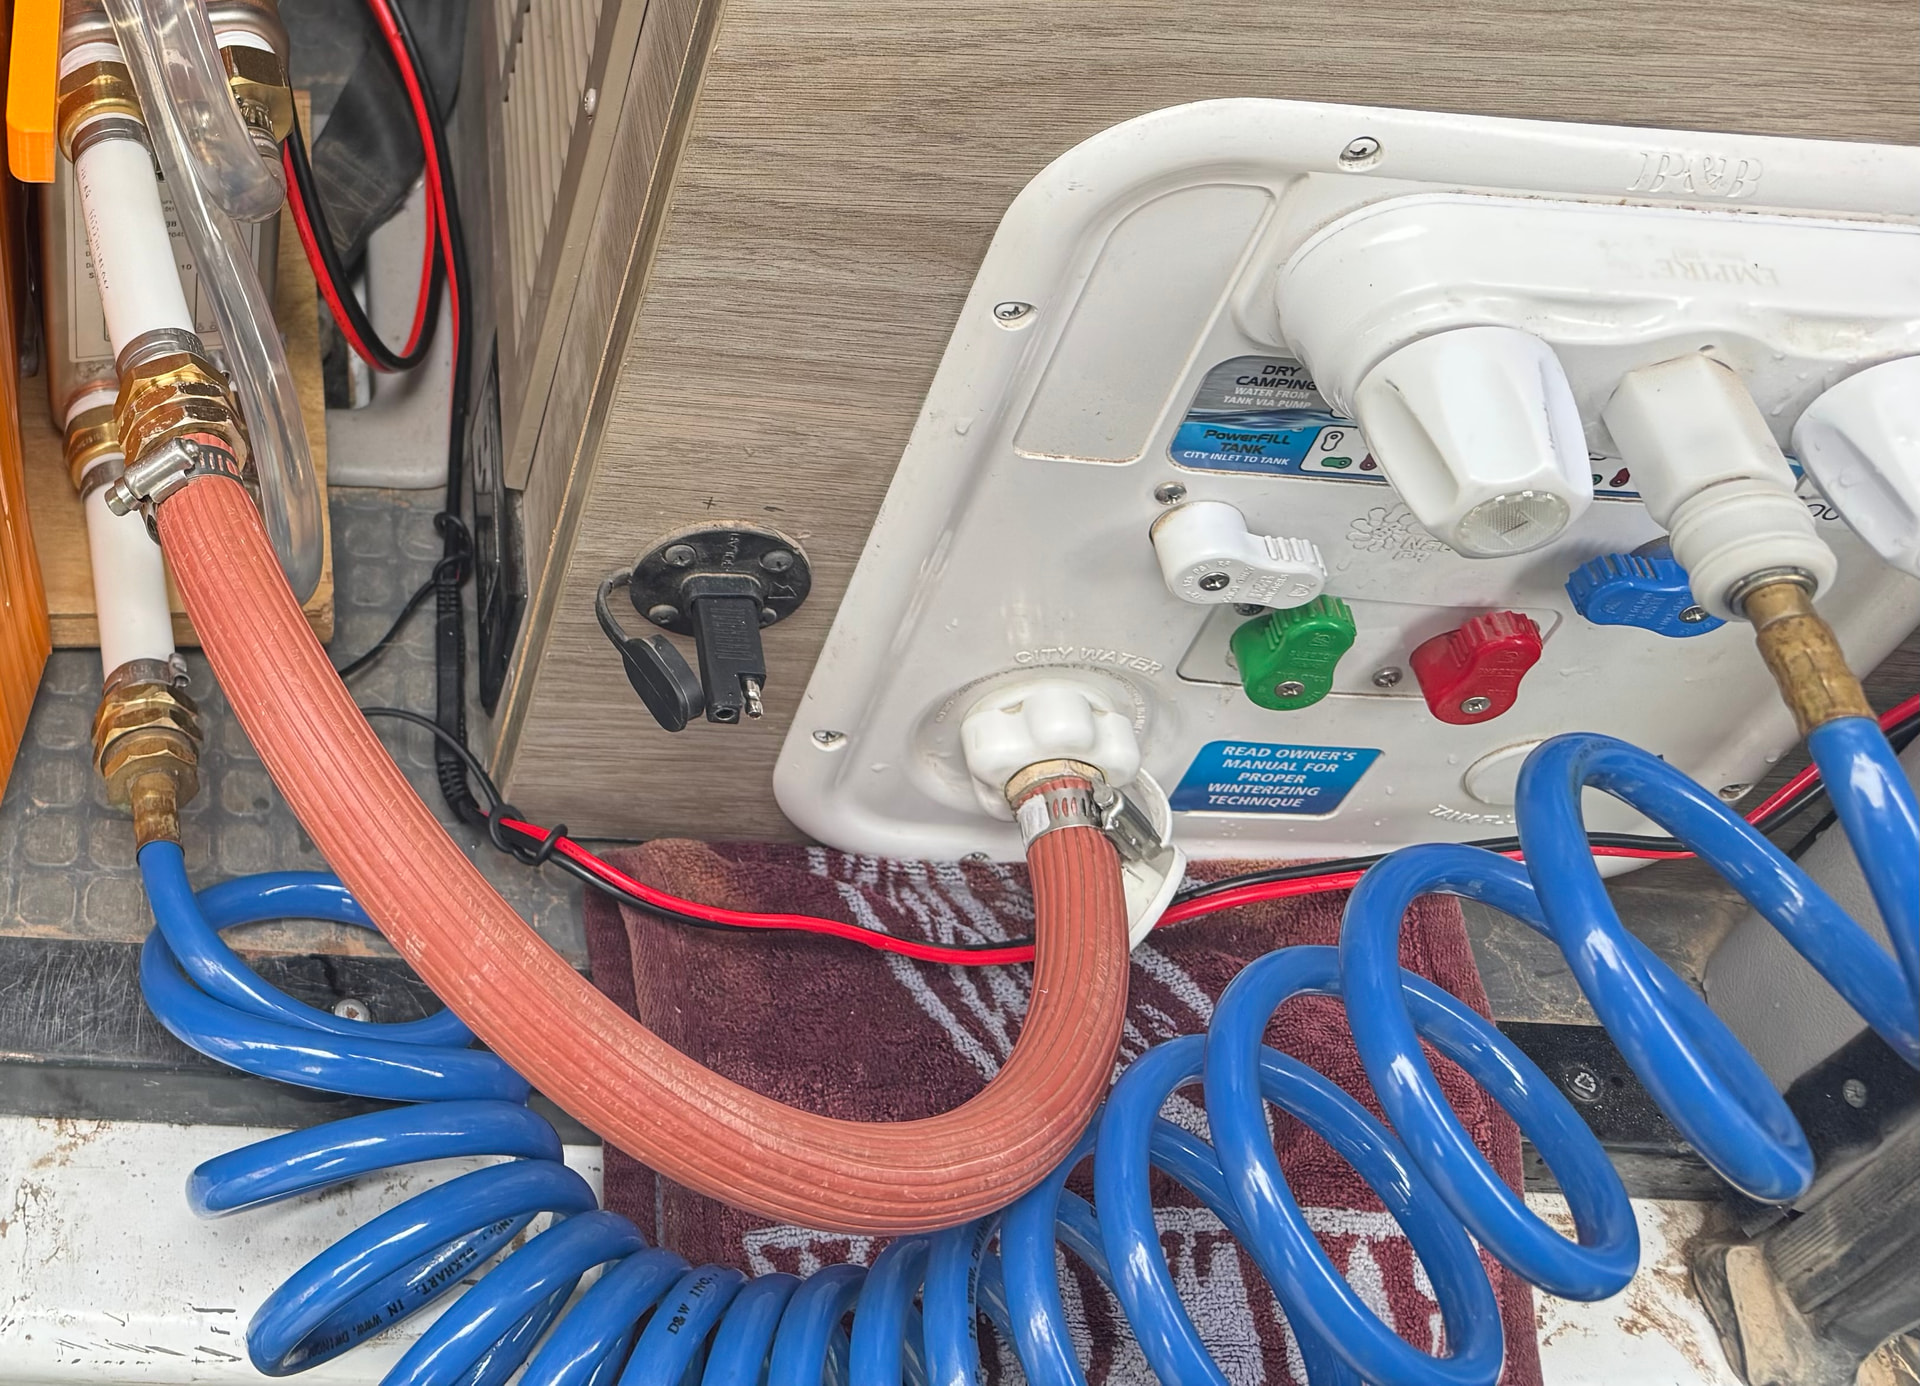
So now the water is slowly circulating from the hot water tank. I have found that it takes 2 hours of this for the 10L tank to get up to temp.
Why don’t van manufacturers use an electric heater to warm up the water tank while you’re driving?
Another fun way to operate is to just dunk the heat exchanger into a container of water (put it in a plastic bag first). It will gradually bring it up to the temp you set your target chip temp to. I did an experiment to cook some eggs sous vide and it worked pretty well.