Finally stepping out of the shadows because I may have gone a little overboard with my latest winter project: turning a Loki miner into a space heater. With the cold settling in and my office already chewing through 900 - 1500W of heat every day, it occurred to me that my ‘dumb heater’ could stand to earn its keep. I found a solid deal on a used S19J Pro and decided to piece together a setup using off the shelf parts from Amazon and other sources online. Turns out, with a little creativity you can turn an ASIC into a surprisingly effective (and not so dumb) space heater.
I’ll admit, this turned into a small research project. Huge thanks to everyone who has posted in this info online! Your info and builds made it much easier to understand what’s possible with these miners and how to repurpose them. I was overwhelmed at first, so I bought a bit of everything: APW3++ PSUs, Loki board kits, 120mm PC fans, 4 AWG wire, WiFi dongles and Resistor packs. Looking back I definitely over complicated things, but the learning process was worth it. In the end, I only ended up needing the core build components I listed below for a S19.
With that said here’s my S19J Pro dual‑hashboard build guide:
Core Build Components:
1x S19 ASIC Miner Variant (Can be found used online/marketplace)
1x Pack of 1Ω resistors - Amazon
2-4x 120mm Arctic P12 Pro PST fans - Amazon
(Tip: The 5 pack on Amazon brings the fan cost down, use 4 fans + a spare)
2-3x 60mm PSU fans (Thermalright TL‑B6B) - Amazon
1-2x CRJ Mini 2‑Pin → 3/4‑Pin fan adapter cables (2 per pack, 3 are needed if replacing all PSU fans) - Amazon
1x Vonets WiFi dongle (if using WiFi; otherwise use Ethernet cable) - Amazon
1x PSU power cord (seller claims 14 AWG - DYOR) - eBay
Guides & References:
Pivotal Pleb’s APW12 120V Unlock Guide
Stackin Sats Podcast YouTube Channel - @Trevorbello
@Josh’s Loki builds here – Great examples of Loki Builds!
Tools & Supplies:
Soldering iron (70W or higher recommended)
Solder
Reflow station with heat gun or heat source (for removing PCB coating)
Hot glue gun (to secure resistors on the APW12 board)
Flush cutters (to cut off the excess resistor leads)
Screwdriver
X‑Acto knife or small sharp blade
Optional parts, but helpful if using Home Assistant & sensors:
1x Sonoff S31 WiFi Smart Plug (Flash with Tasmota or ESP Home) - eBay
1x FTDI USB UART IC FT232RL USB to Serial (Tip: Raspberry Pi can be used to flash the S31 smart plug FW) - Amazon
1x Pack of Test Hook to Female Jumper Wires - Amazon
1x Shelly H&T Smart WiFi Temp Sensor - Amazon
Build Notes:
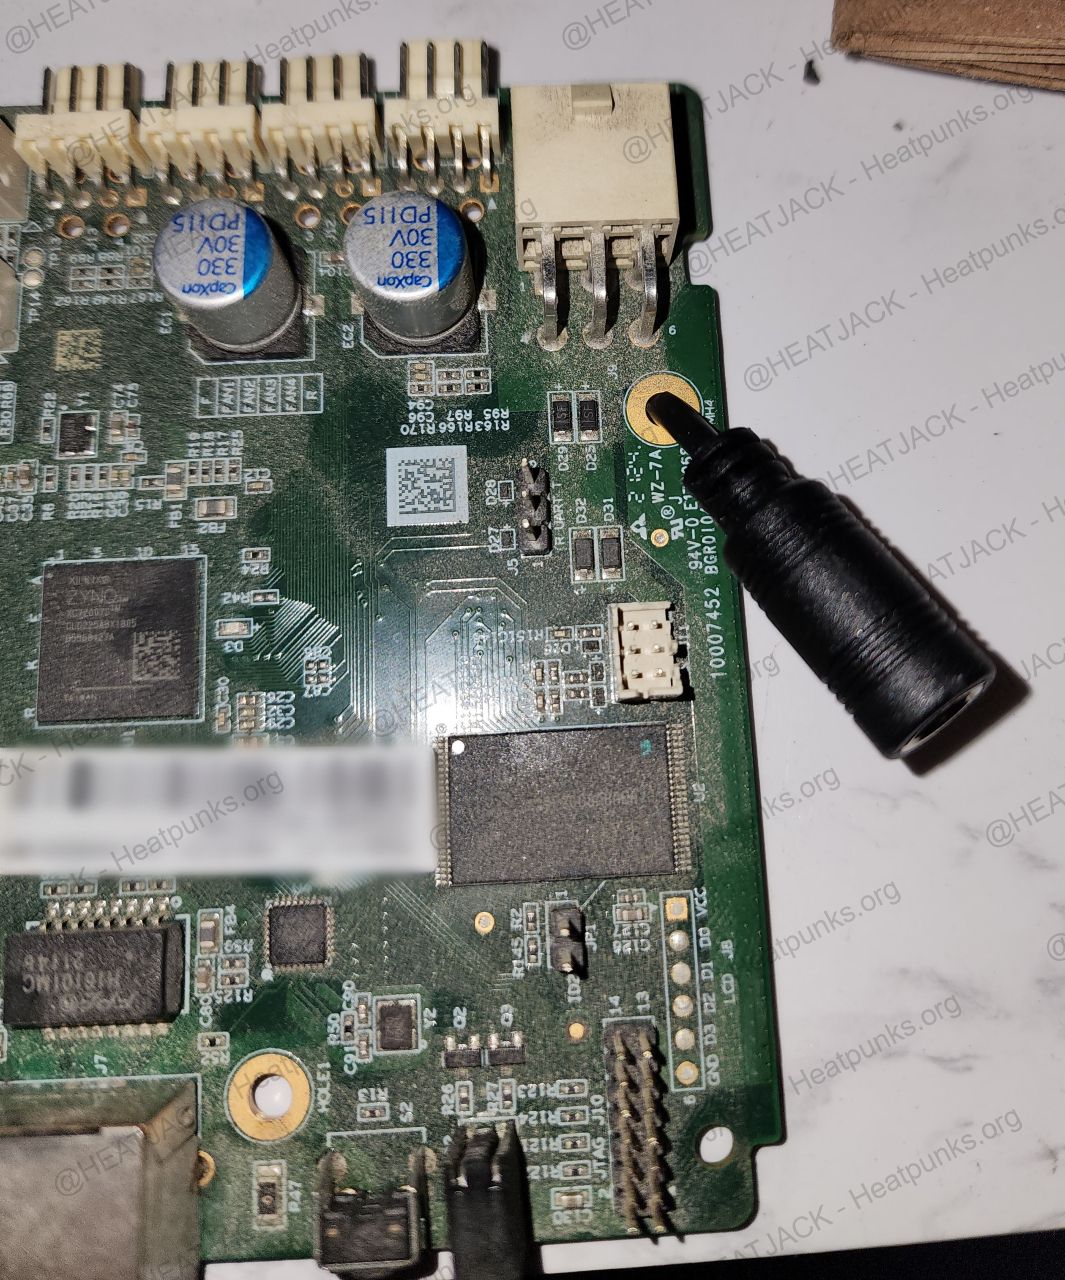
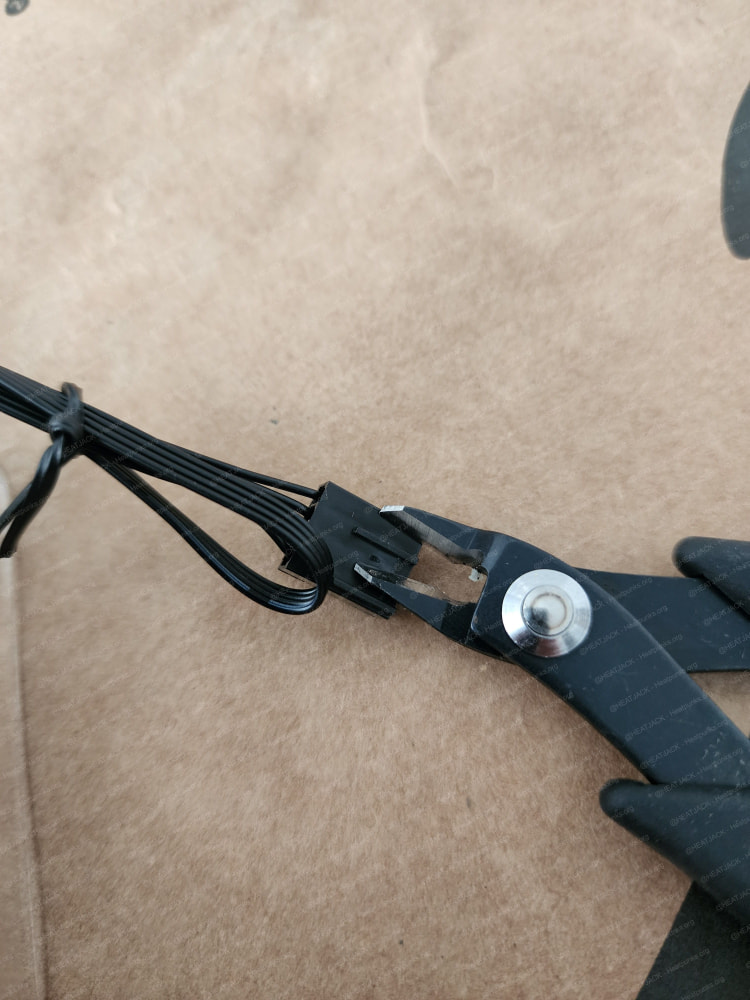
Stock S19 Miner Fans: Are very loud and annoying! If you can’t stand that high‑pitched whine swap them out ASAP. The stock PSU fans don’t offer easy speed control unless you add an inline resistor, or you replace the 60mm PSU fans with quieter ones while you already have the PSU open for the resistor mod. If you’re upgrading the 120mm hashtunnel fans, the plastic guide on the fan connector needs to be trimmed so they fit properly into the fan headers on the miner’s control board:
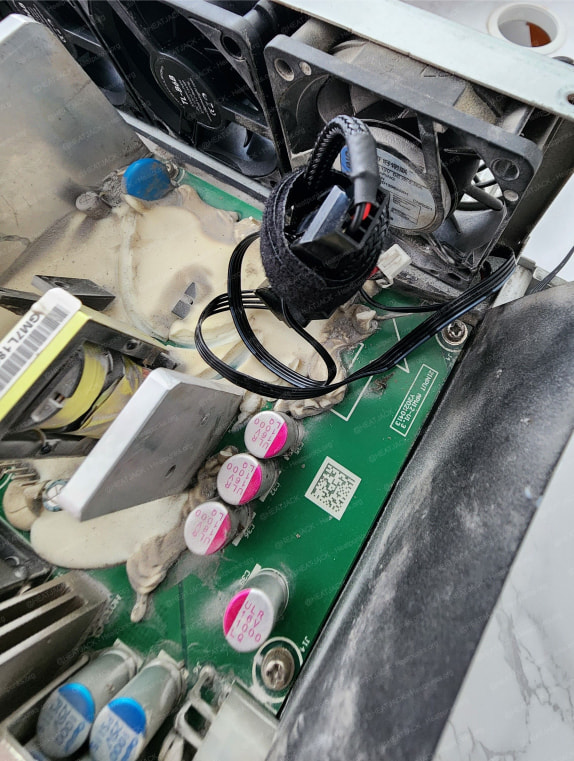
PSU Fan Adapters (CRJ Mini 2‑Pin → 3/4‑Pin Fan):
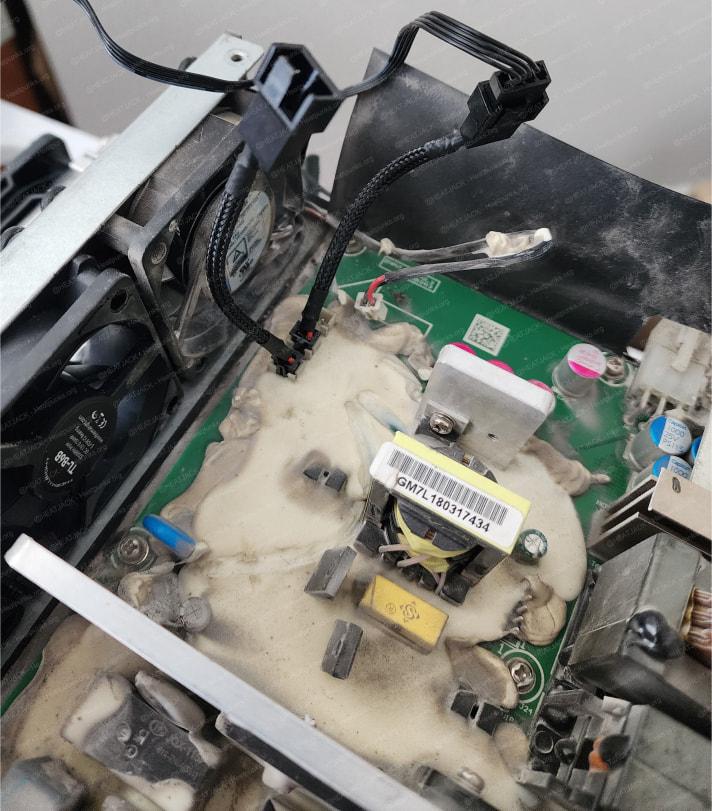
PSU Fan Adapters (CRJ Mini 2‑Pin → 3/4‑Pin Fan) - Tip: Route fan cables under each fan for easy cable management. I only swapped out 2 of three fans - YMMV.
PSU Board Coating: Removing the protective coating on the PSU board can be tedious, so take your time with this step. Gently heating the area with a hot air gun or a small torch held at a safe distance softens the coating and makes it much easier to scrape away. Always do this in a well ventilated space since heating the PCB coating can release harmful fumes. (Tip: If you start to see copper, STOP! You’ve gone too far, possibly cutting copper traces. Gently cut and pick at the silver area on either side of the 0805 surface mount chip resistors on the PCB):
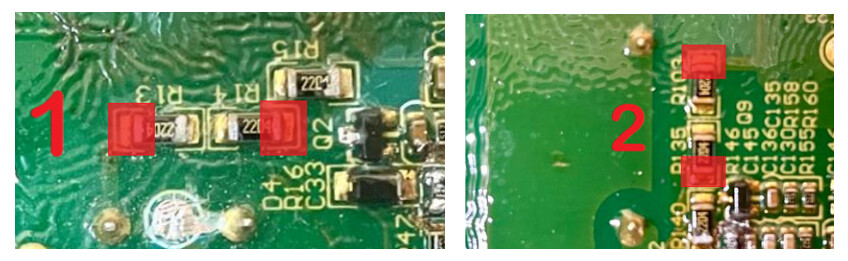
The Pivotalpleb APW12 120 Volt Unlock Guide covers this topic in depth, so I highly recommend you read through Zack’s guide. #Photo Creds: Zack @ Pivotalpleb.com
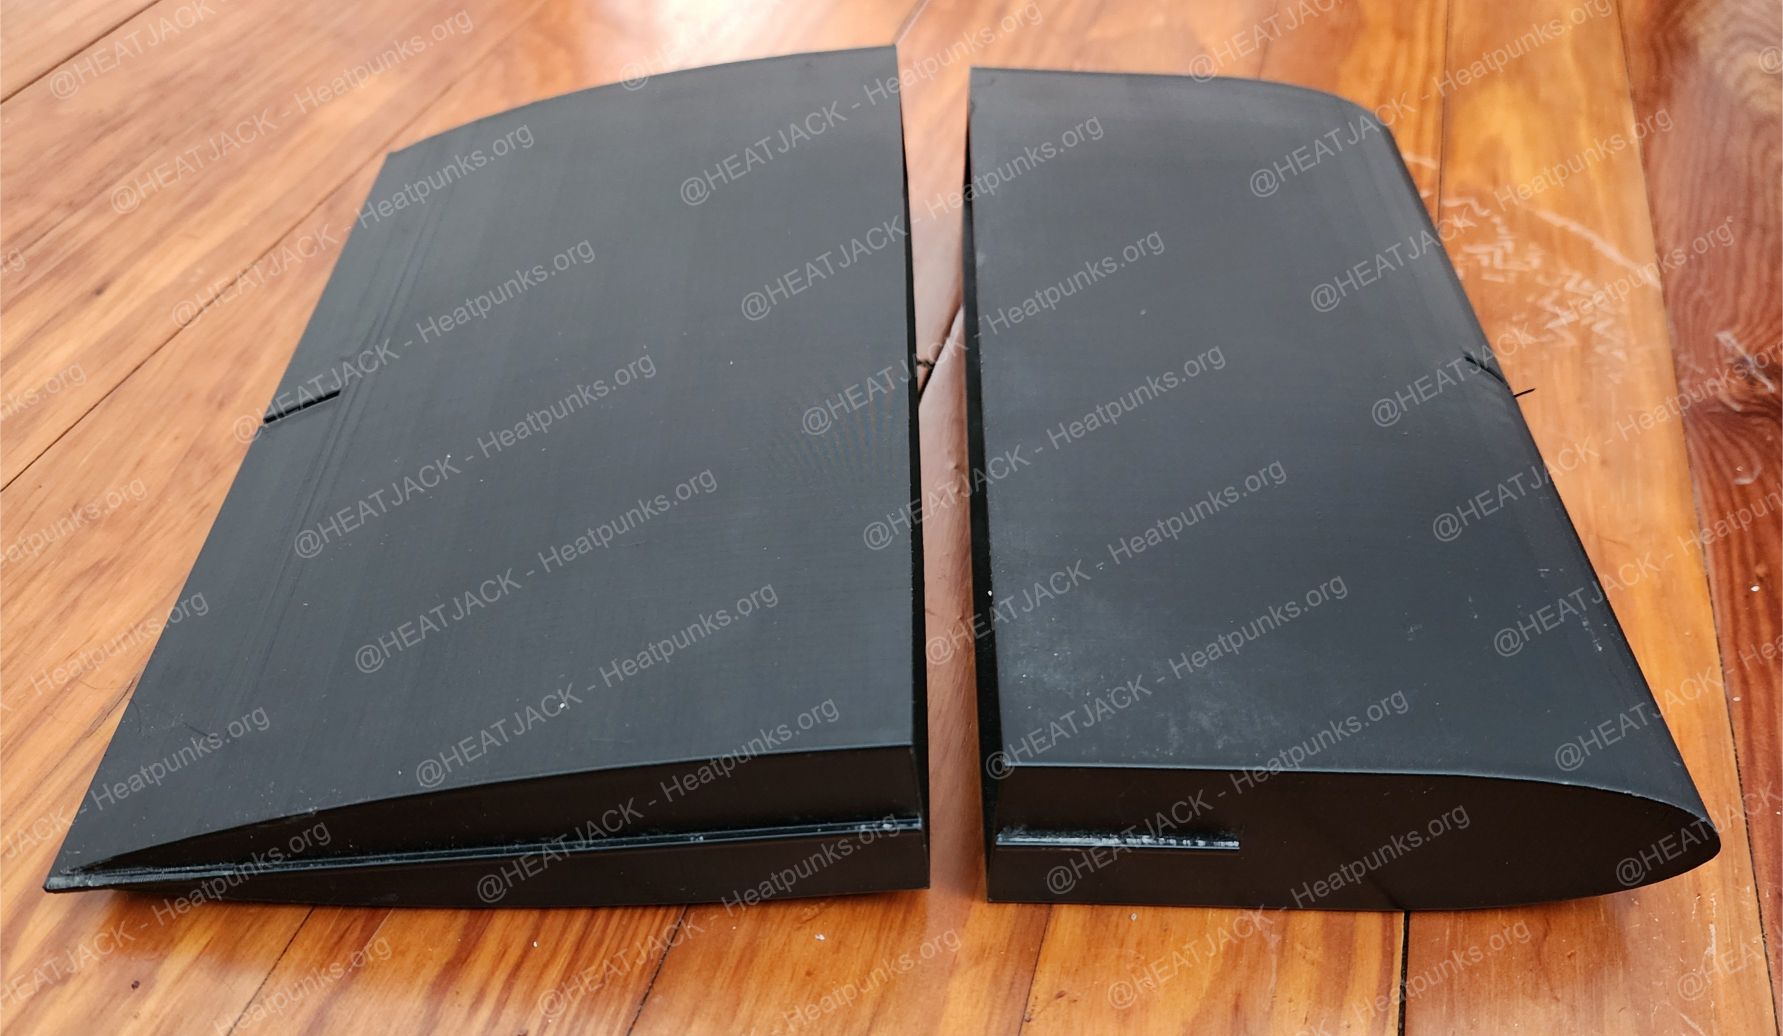
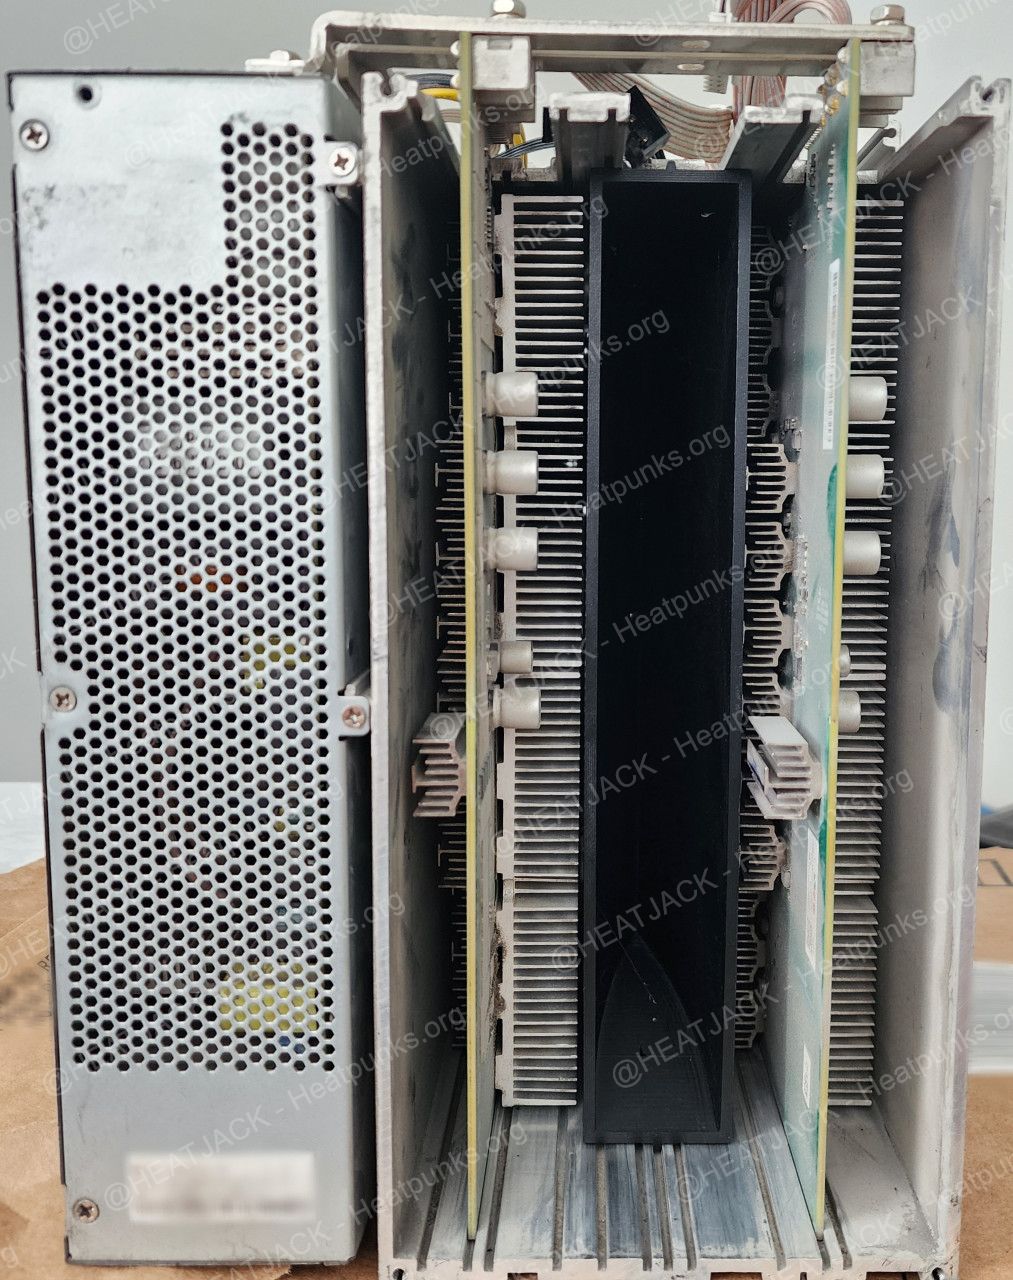
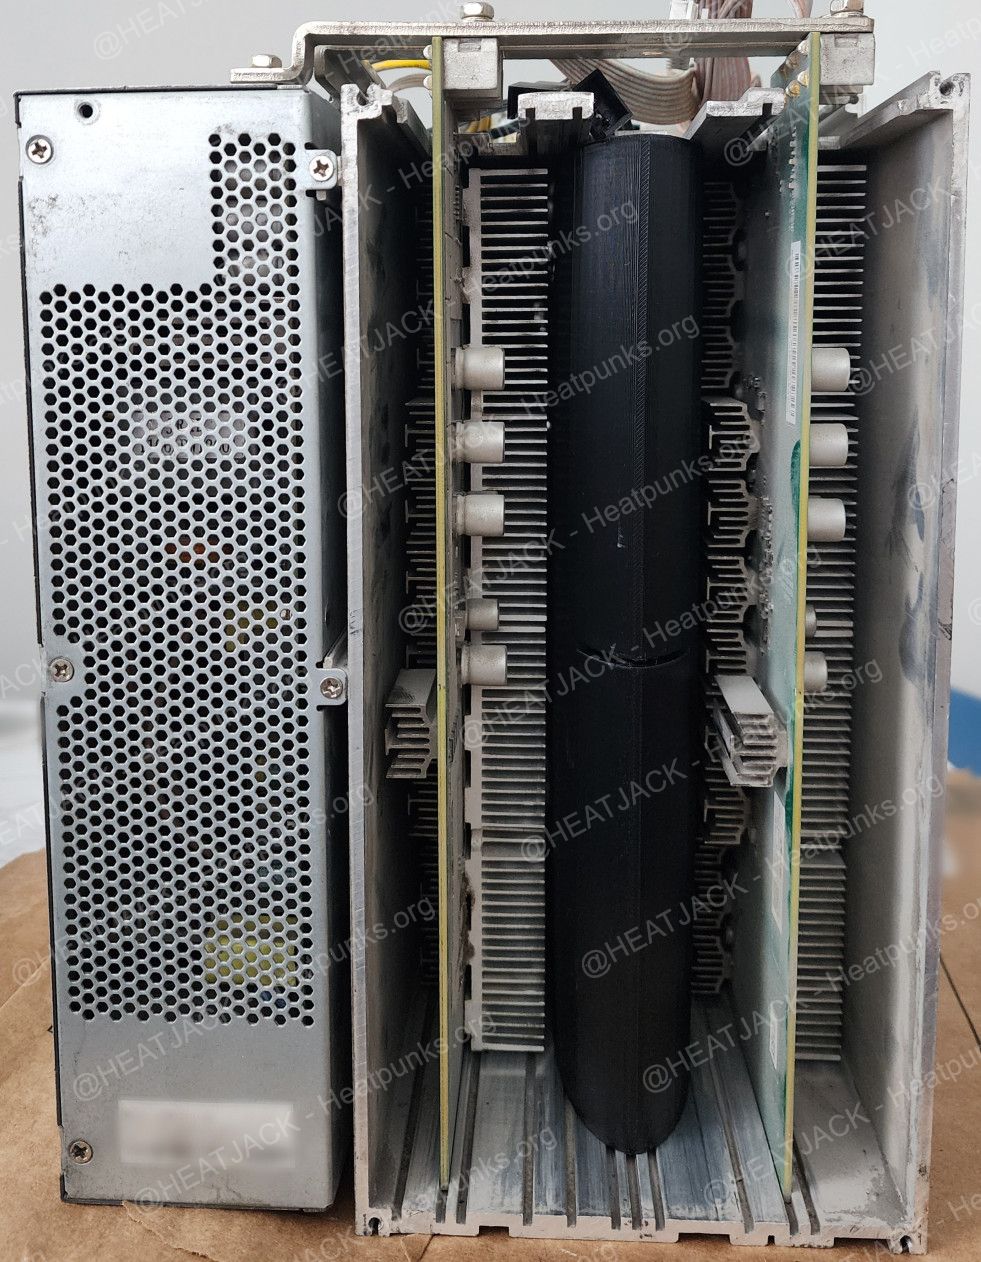
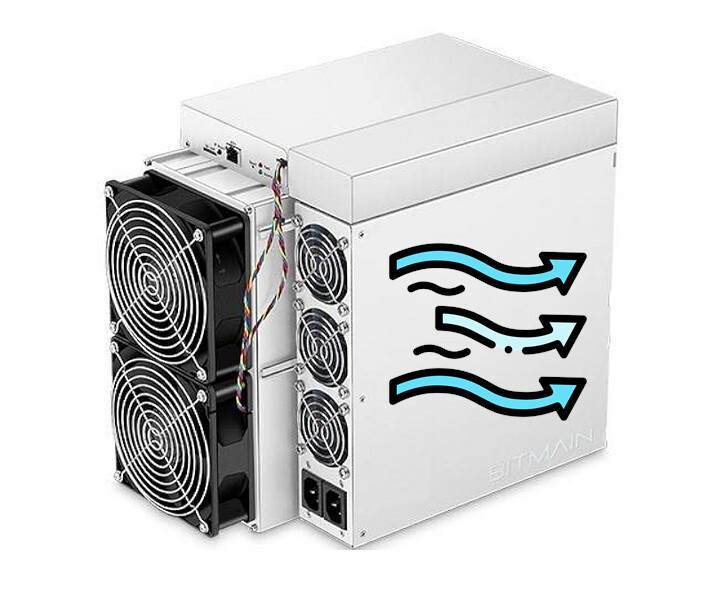
Air Baffle Kits: I tested my S19 in both single‑board and dual‑board configurations. In the end, I went with the dual‑board setup for the extra hashrate and the added heat output since it warms my office better. The air baffle kits from structur3.io make a huge difference in airflow, temp control and overall performance. STL files are available here. (Tip: Depending on your specific miner model, you may need to print the “Pro” version of the STL. Each baffle is split into two halves. Print the S19 intake section, then pair it with the exhaust section that matches your miner model. For example: I printed an S19 intake and an S19 Pro exhaust to match my S19 Pro. Once both halves are printed, combine them to complete the baffle. Great work done by: @Satstackingpleb) - The PSU & hashtunnel fans flow like this:
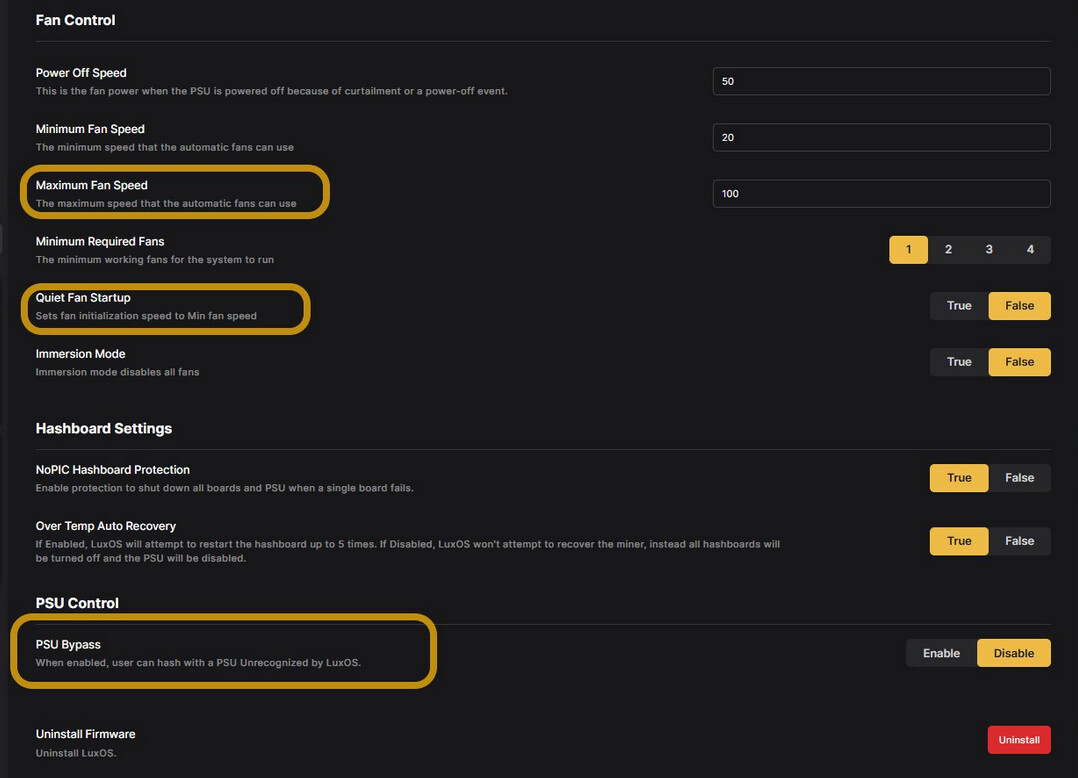
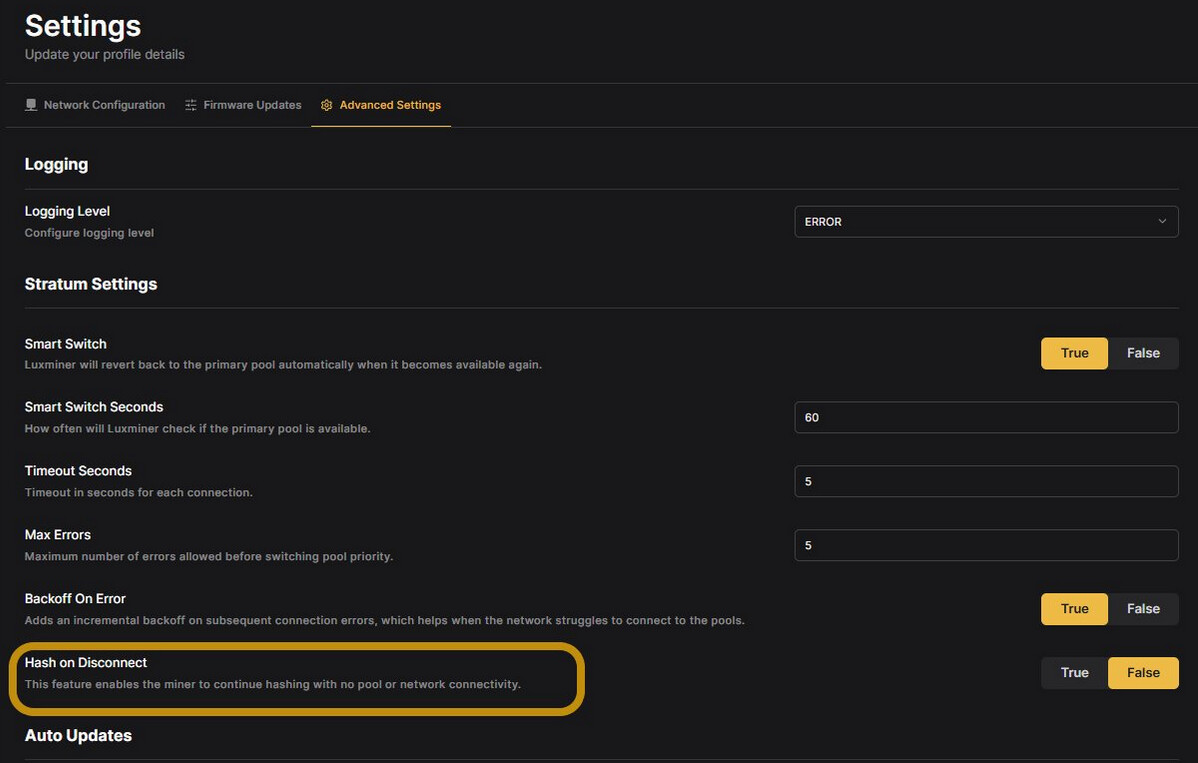
Miner Firmware: I choose to run LuxOS and have been very satisfied with the results. Structur3.io has some great power performance profiles listed at the bottom of this page. I would use those settings as a starting point, if you opt for a dual hashboard setup the TH/s double and so does the power. To get LuxOS on your miner you must install the stock Bitmain/Antminer firmware provided by LuxOS and then use LuxOS commander to install LuxOS. The ATM feature is quite handy in LuxOS to tune your miner. I have the following values set:
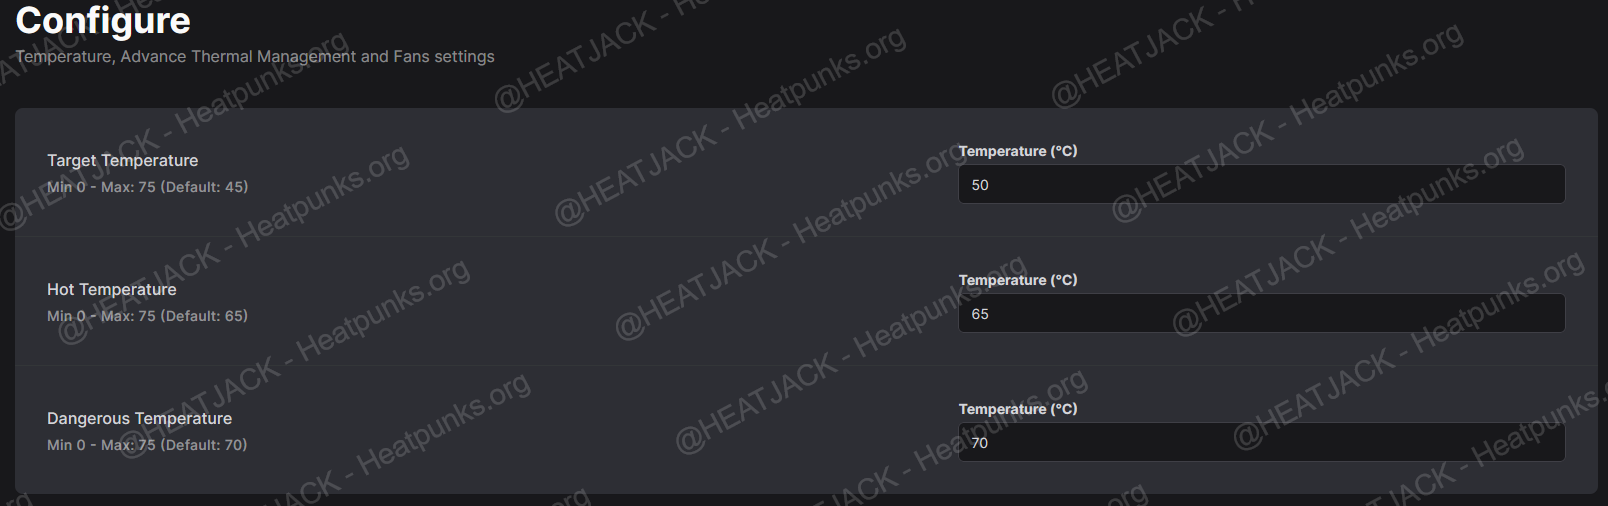
Temperature & ATM:
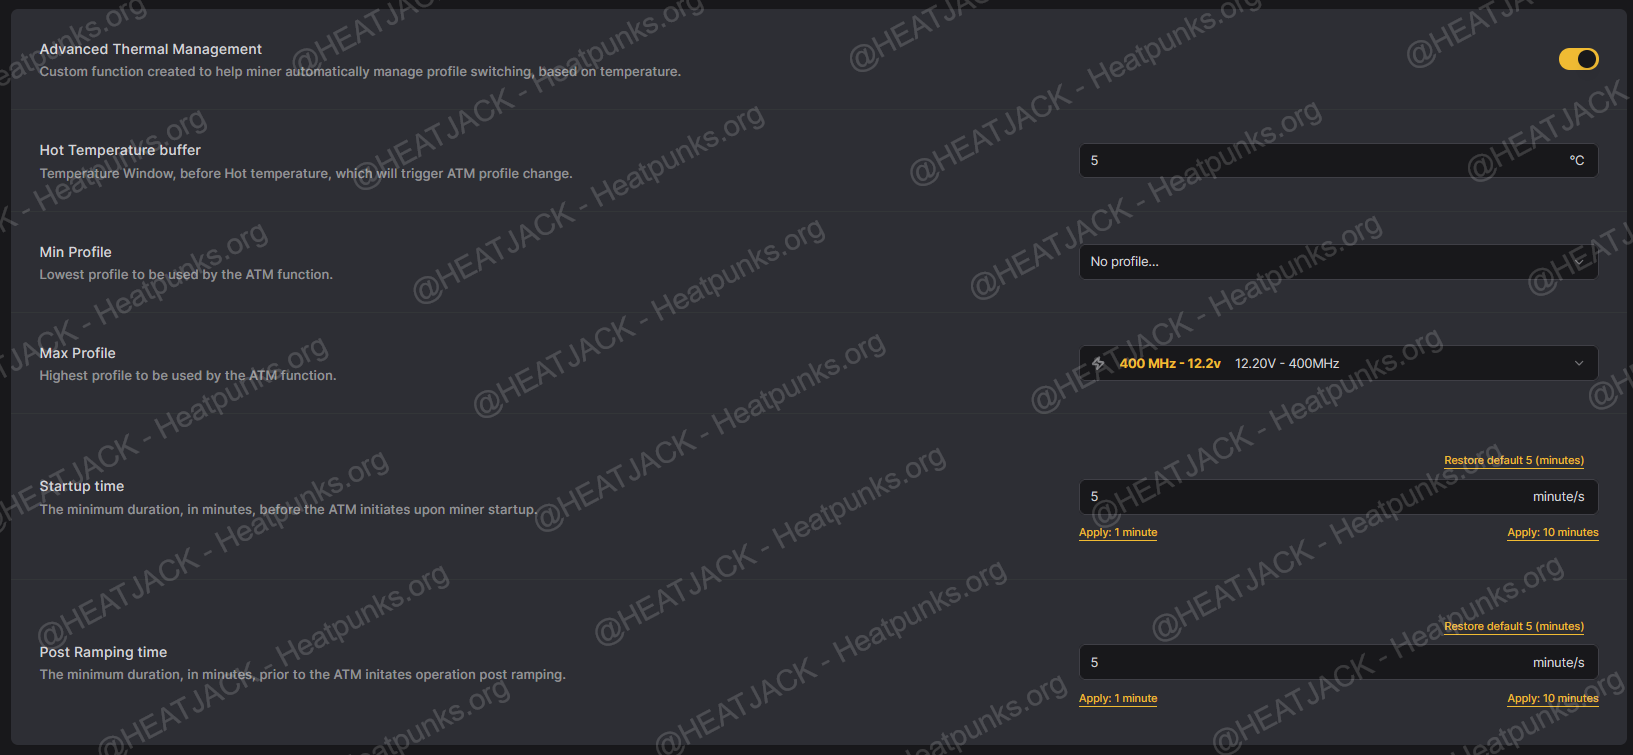
LuxOS ATM Temp Settings:
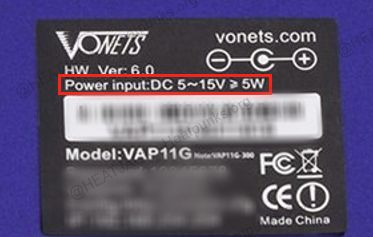
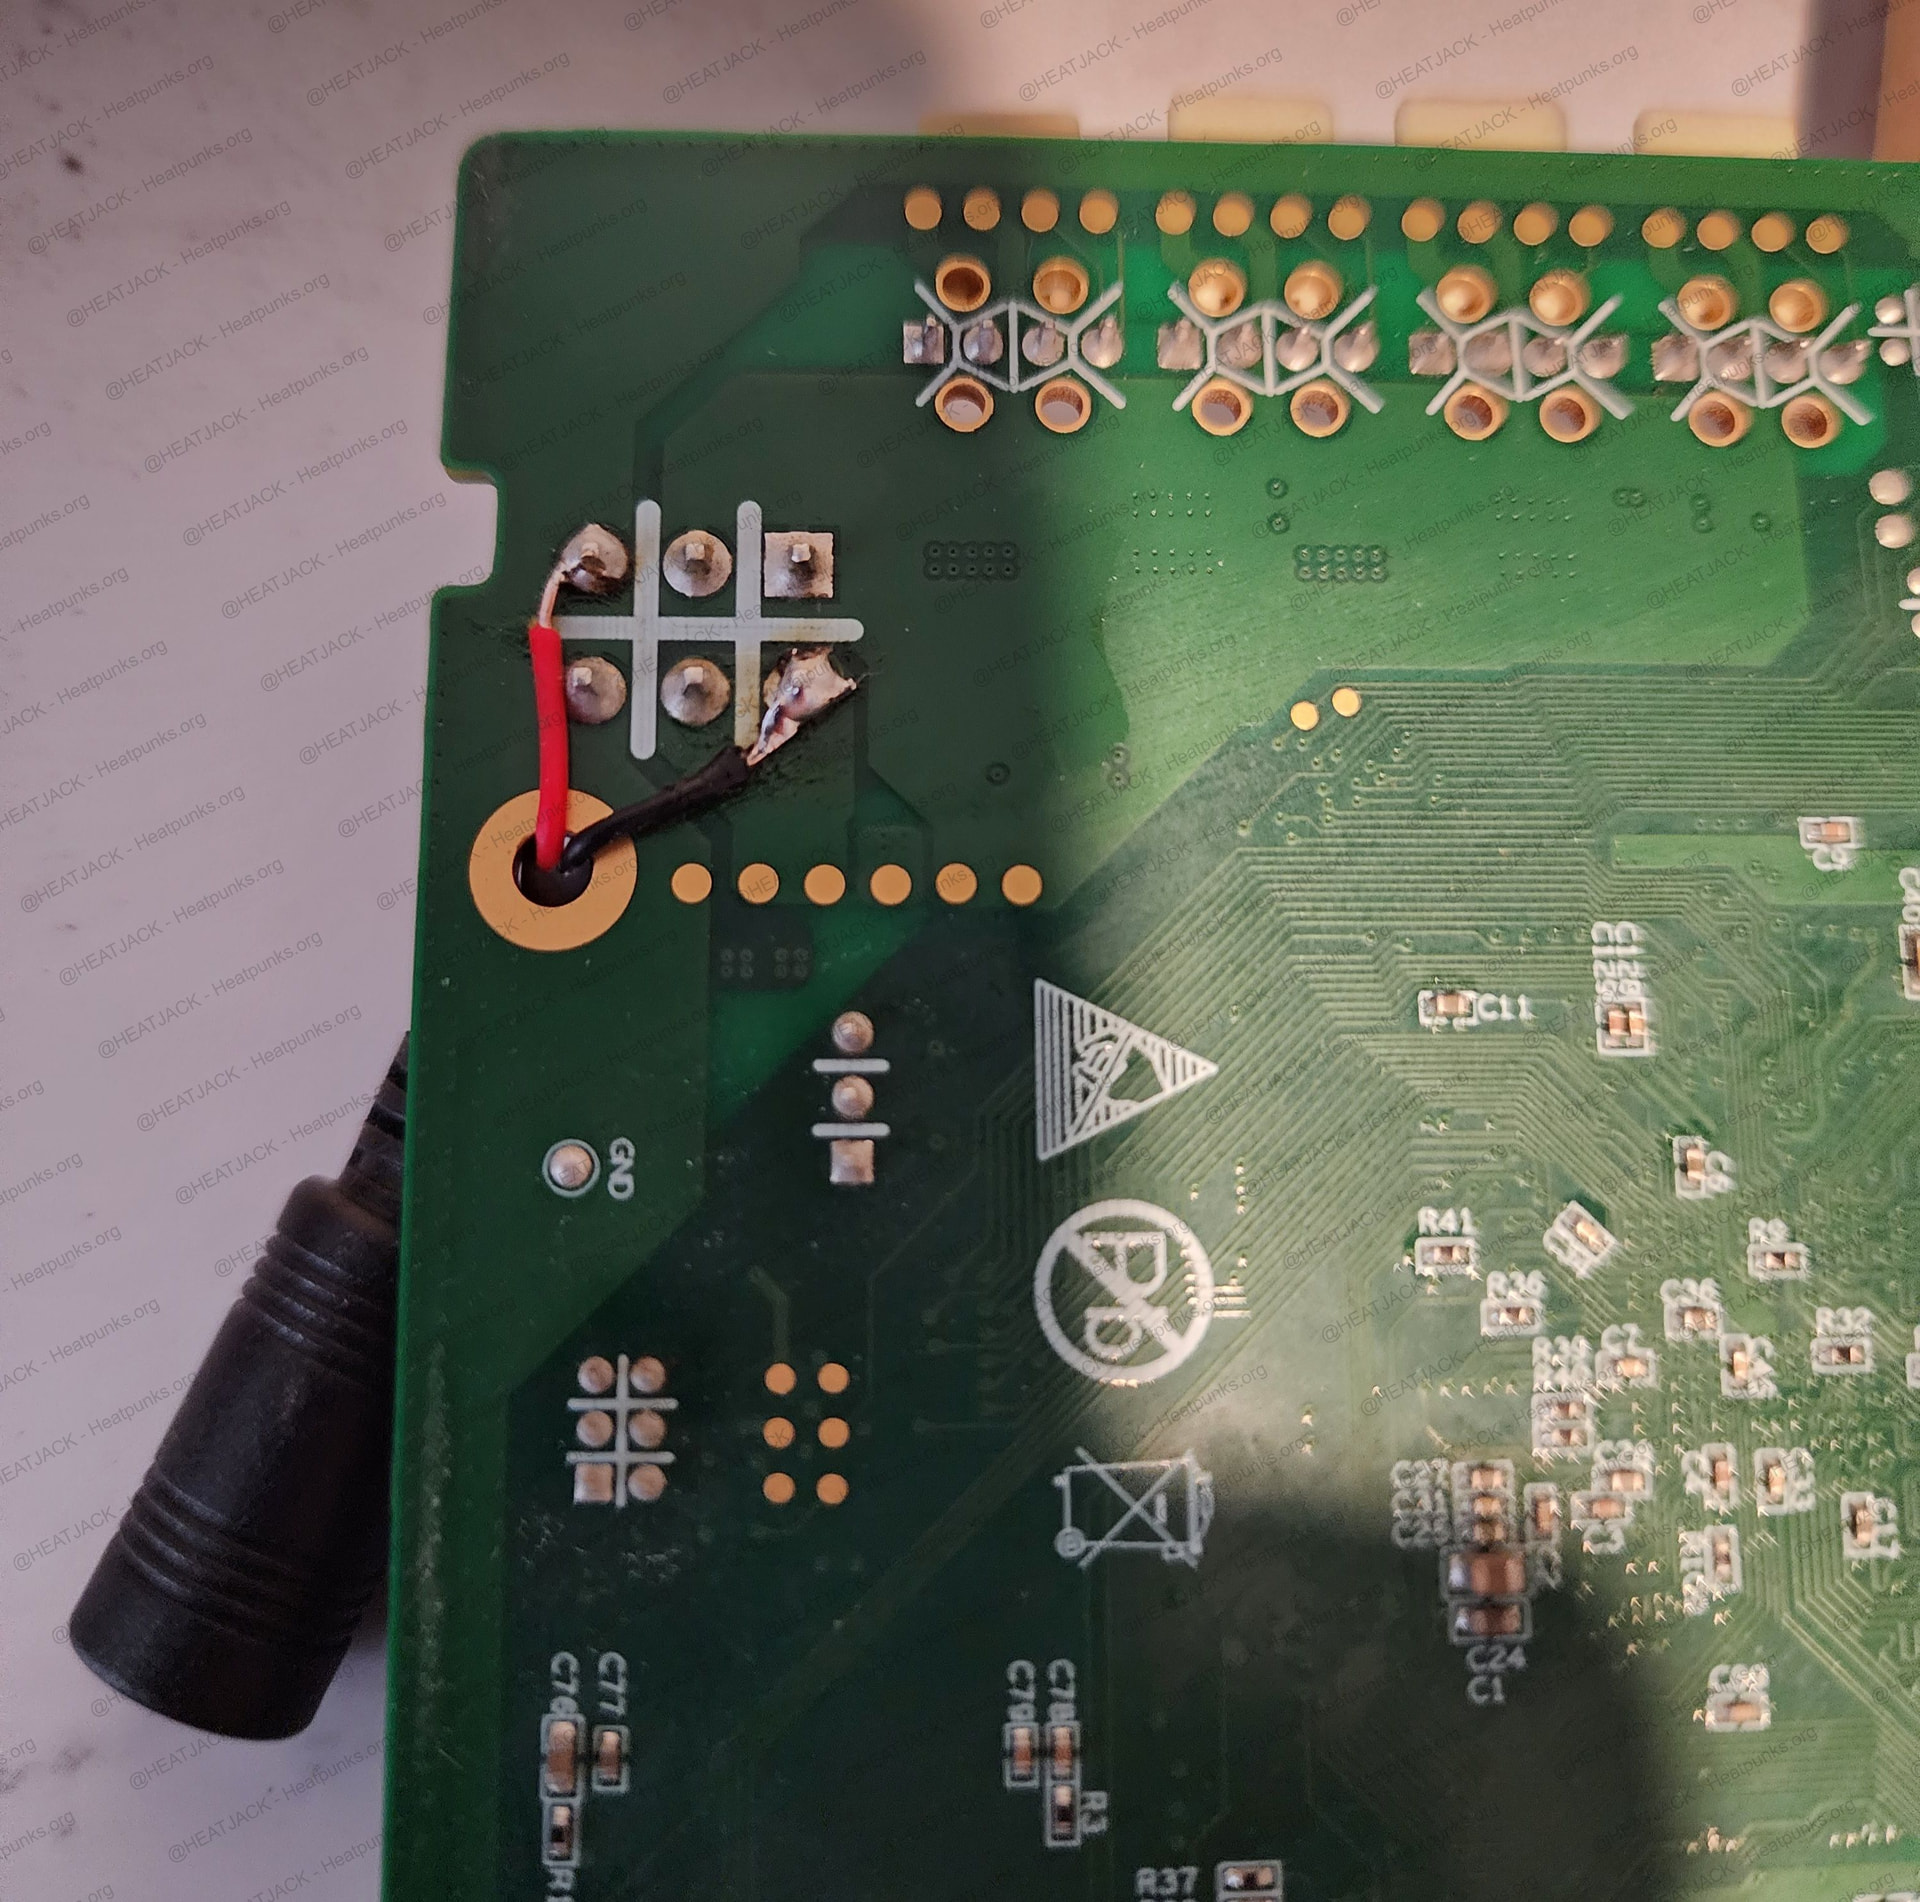
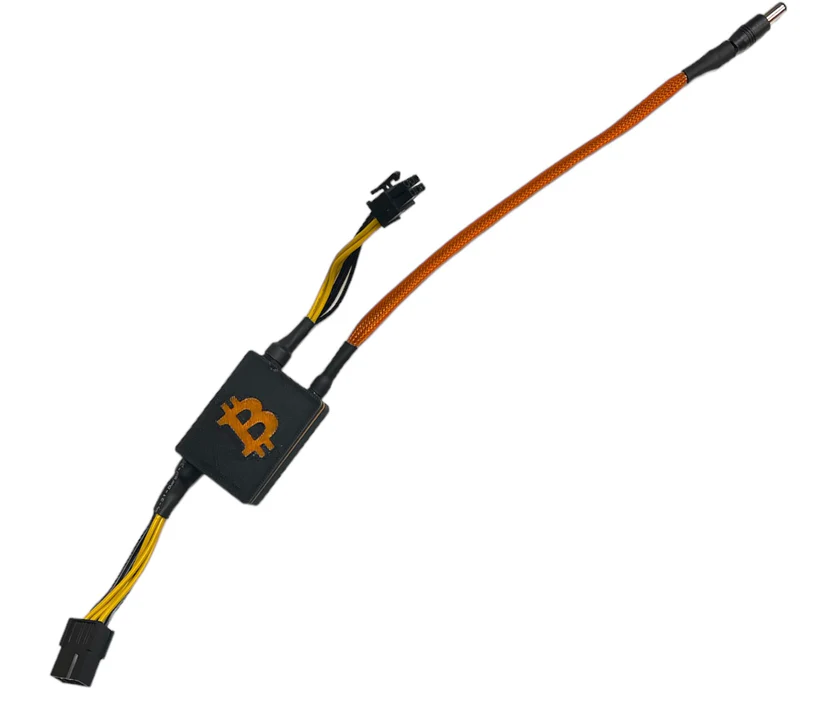
WiFi Dongle Power: Right now I’m powering the Vonets WiFi dongle with a standard USB wall adapter. It works fine, but there are cleaner ways to do it. You can use a dedicated WiFi bridge power splicer from ixtech.xyz - or if you’re comfortable with a bit of tinkering, tap into the control board power cables and build your own power feed.
Home Assistant Integration: The Exergy Stealthminer integration GitHub works right out of the box with Home Assistant. During setup, it will prompt you for the miner’s IP address and port. I initially entered my miner’s IP with port 4028, but kept running into errors. Leaving the port at the default 8080 solved the issue immediately. I use this integration heavily with my power plug and temp sensor. Great work done by: @tylerkstevens & @tronsington
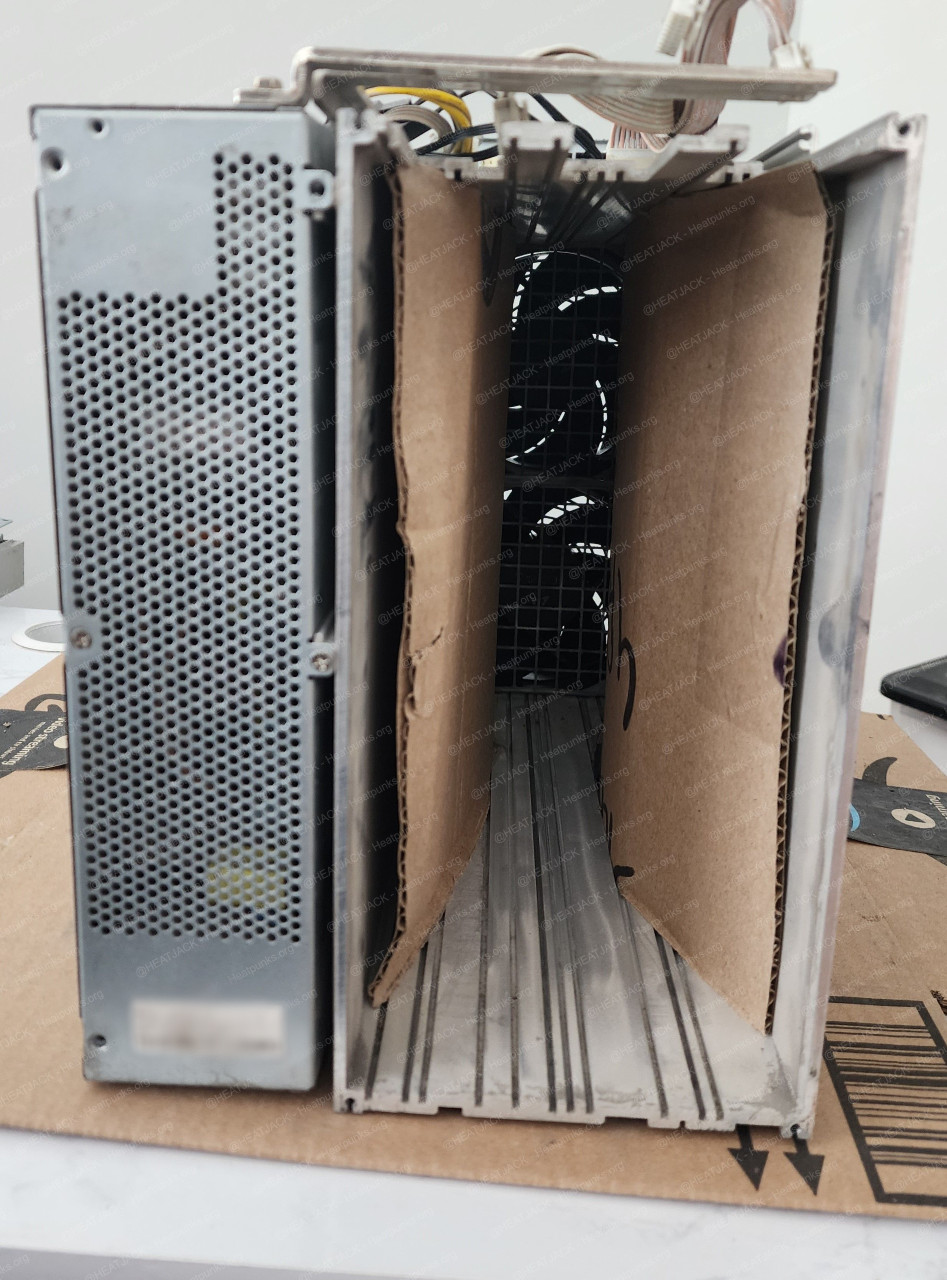
Build Pictures (Cardboard air baffle setup pictured… because HeatPunk, the cooling results convinced me to 3D print the actual air baffles):
Dual-Board Setup:

Single-Board Setup:
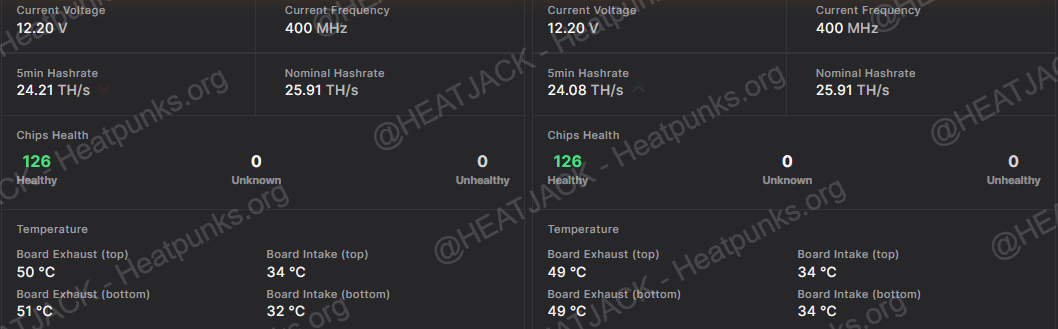
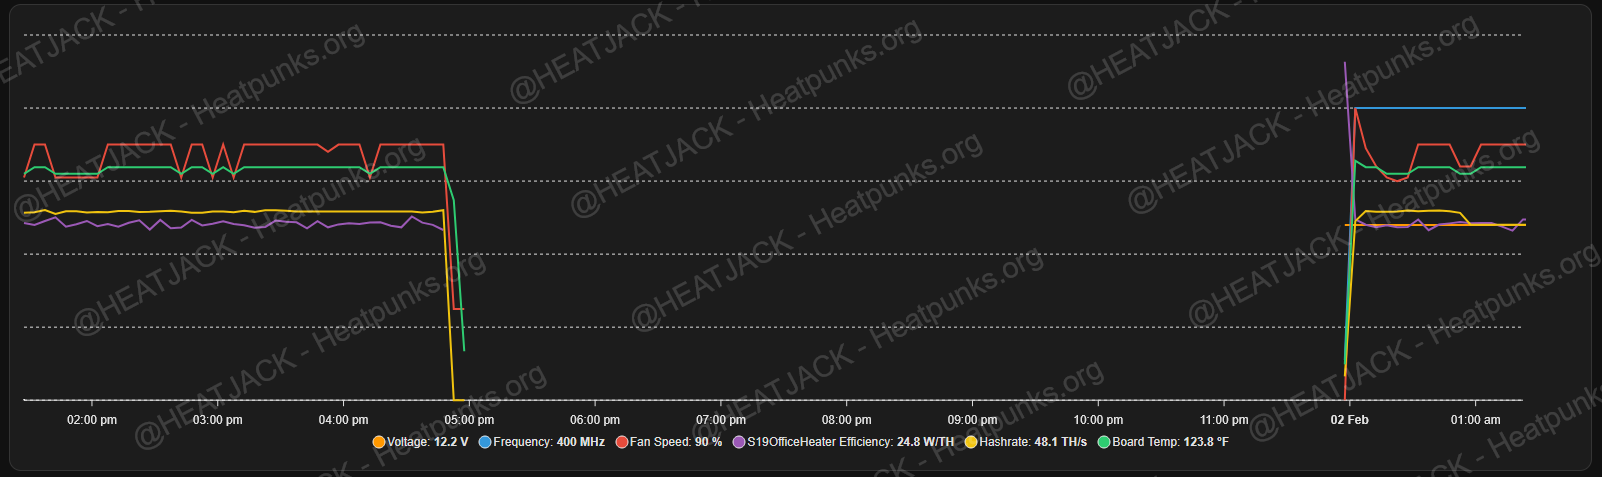
LuxOS Dashboard Stats:

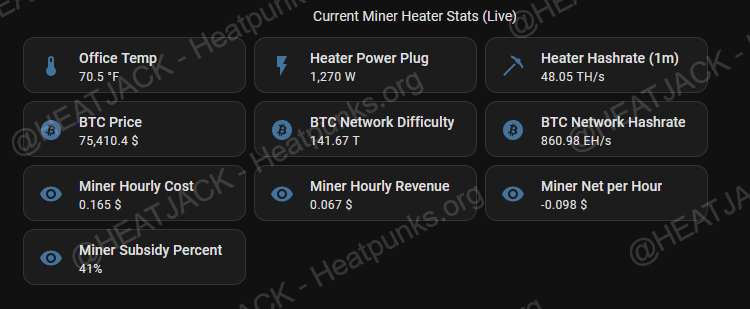
Custom Home Assistant Dashboards I created (Thanks to the xergyheat HA integration):
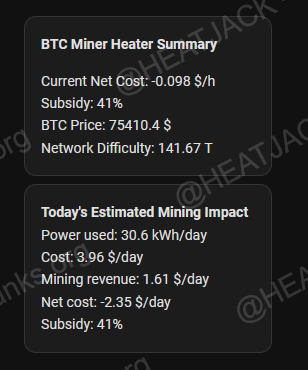
Miner stats, BTC network stats w/active “real-time heat rebate” stats that adjust to network, hashrate and power usage:
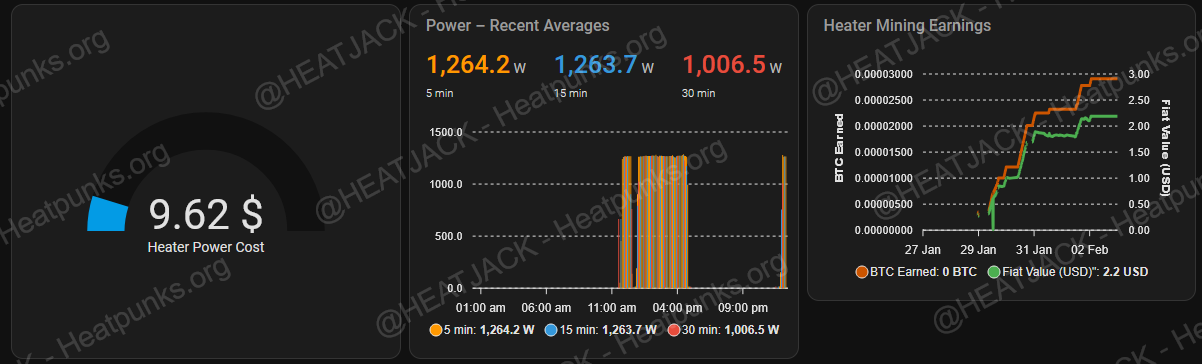
Miner estimate earnings (pool mining), power usage stats and chart for single pane view:
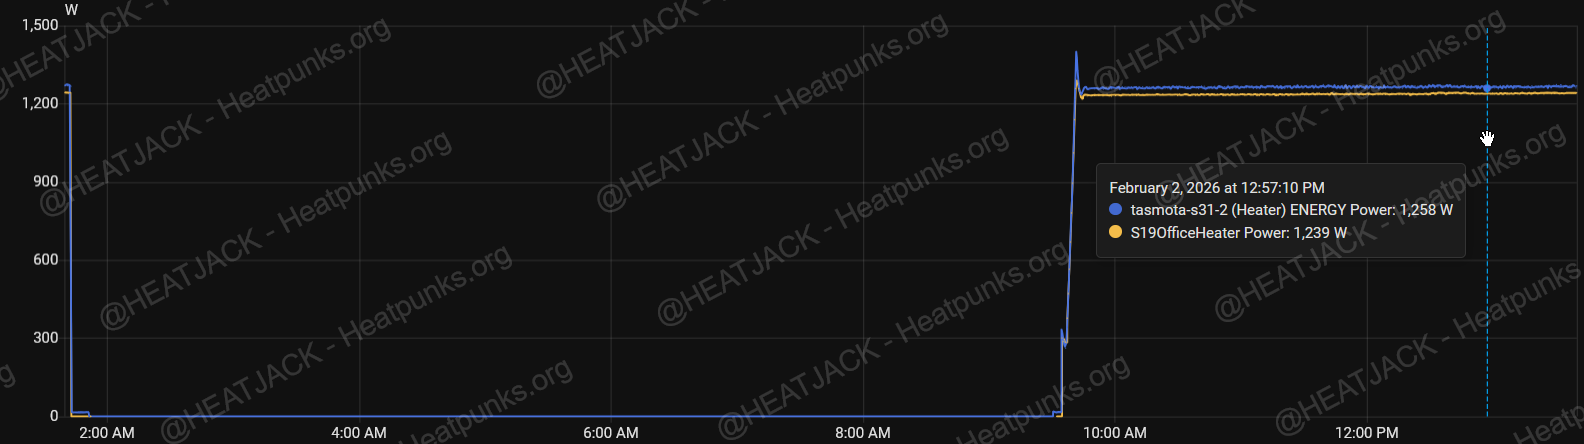
Smart plug wall power reporting vs Miner power stats:
Over time I plan on updating post this as my heater goes though different configurations. Feel free to ask any questions and I’ll respond when time allows.
*** If you found this guide helpful and plan to share, reference or build upon it please make sure to credit the original creators. Clear and visible attribution not only respects the work that went into it, it strengthens the entire HeatPunk ecosystem by keeping knowledge traceable and collaborative. ***
-HeatJack